Objective: To write a short tutorial the uses Sinatra DSL for the backend, is styled with the twitter bootstrap and PostgreSQL for the database and the heroku hosting platform for hosting.This is a branch off of a post about Learning Rails. I branched it because I found Sinatra interesting and wanted to document buildiing a production app.
Tools that are being used for this tutorial.
- Macbook Air running OS X 10.8.5
- Heroku account (FREE)
NOTE: Periodically you will see the word REFRESH in this post. It is to let you know that you can refresh your browser at that point in the tutorial.
Prior to refreshing your browser the ruby server must be stopped (press CTRL+C at the terminal) and restarted ($ ruby myapp.rb). You can do it that way OR you can use shotgun instead.
Shotgun allows your to refresh your browser without stopping and starting the ruby server to see changes made to files. To use shotgun. Install and run that gem at the terminal using:
[code]
$ install shotgun
$ shotgun myapp.rb
[/code]
After these commands are issued, you will not need to start and stop the ruby server after files are create, edited or deleted. You will need to use localhost:9393 instead of localhost:4576. To stop using shotgun get back to using the standard method, stop the server and start it with the traditional method (ruby myapp.rb).
Steps
- Launch the terminal application.
- Create a new directory for your application and named it your-app.
- Create a file inside of the directory and name it Gemfile.
- Add the following code to the file.
- Run the following code at the terminal command line to install the gems listed inside of the Gemfile
- Inside of the directory, create a “config.ru” file and add the following code:
- Inside of the directory, create a file called “database-config.rb”
- Inside of the directory, create a file called “myapp.rb”
- Inside of the directory, create a file called “Rakefile”
- Run the following command at the terminal command line[code lang=”html”]$ rake db:create_migration NAME=create_posts[/code]
- Edit the file named with the “
+create_post.rb” and include the following: - Run the following command at the command line in the terminal to start the migration; [code lang=”html”]$ rake db:migrate[/code]
- You can optionally run tux. Which is essentially a tool that allows you to perform task inside of the terminal shell without launching the application into a browser. OR you can skip to the next step.
- Commit this version with GIT.
- Setup the first route by adding the following code to “myapp.rb”:
- Add this code to “myapp.rb” to set the variable for title.
- Create two new directories within the apps main directory (your-app) as follows, “views” –> “post” (e.g. your-app/views/posts/).
- Now change to the “post” directory from the terminal. e.g.[code]$ cd views/posts[/code]
- Create a new file named “index.erb”. This is the template that correlates to the route created in the previous step 15, specifically line 5. Use the following code:
- Start the ruby server locally on your Mac using the code [code lang=”html”]$ ruby myapp.rb[/code]
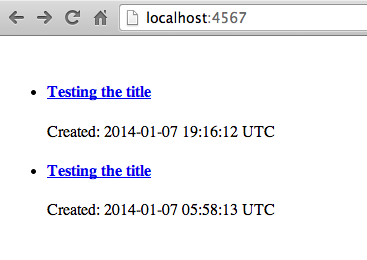
- Visit the local sever on your Mac by typing “http://localhost:4567” into the address bar on your browser and you should see the following:
- Create a new file and name it “layout.erb” and save it in the “views” folder. Place the following code in that file:
- Next we will add the route to handle the title when clicked. Place the following code at the end of your “myapp.rb” file:
- Next we will add the template to handle the title when clicked. Create a file named “view.erb” inside of the “posts” directory (your-app/posts) and place the following code inside of it:
- Place the following code inside of the “myapp.rb” file. Make sure it is above the code in step 23, if not you may receive an “Could not find post” error or similar error.
- Next we will add the template to handle the “New Note” function when clicked. Create a file named “create.erb” inside of the “posts” directory (your-app/posts) and place the following code inside of it:
- We are now going to add some code so that both the title and body cannot be null/empty, and the title has to be at least 5 characters long during submission of a new note.
- Open your “myapp.rb” file beneath the existing required elements.
- Next replace the following code to the top of your “myapp.rb” file and replace:
- Replace the following code in the “myapp.rb” file:
- Finally, add the following code to the “layout.erb” file:
- Update your layout.erb file with the following code:
- Lets stop and commit the current files to GIT using:
- Now we will add a edit post feature.
- Place the following code at the end of the “myapp.rb” file
- Inside of the “posts” directory create a new template file and name it “edit.erb” and place the following code inside of it:
- Open and edit the view.erb template fill by replacing this:
- We will now add some security to the app. At this point you can enter html tags into the title or body fields, press enter and execute on the form. We do not want people executing javascript into our forms, also known as XSS.
- To prevent XSS, add the following code to your “myapp.rb” file:
- Now add the following code to the “view.erb” template.
- Open the “edit.erb” file and update it to reflect the following:
- Finally update your “index.erb” file to reflect the escaping with the following:
- Lets commit the current files to GIT using:
- Last but not least, we will push the app to heroku.
- Enter the following code into the terminal to send the files to heroku:
[code lang=”html”]
# Gemfile
#This file contains all of the gems that will be used in this app – Kyle M. Brown
source ‘https://rubygems.org’
ruby "2.0.0"
gem "sinatra"
gem "activerecord"
gem "sinatra-activerecord"
gem ‘sinatra-flash’
gem ‘sinatra-redirect-with-flash’
#Tells your Mac to use sqlite locally during development
group :development do
gem ‘sqlite3’
gem "tux"
end
#Tells heroku to use postgreSQL in production/live
group :production do
gem ‘pg’
end
[/code]
[code lang=”css”]$ bundle install[/code]
Note:This command will create a Gemfile.lock inside of the directory displaying the gems and exact versions of each that were installed.
Note: This is a file that heroku looks for.
[code lang=”html”]
# config.ru
require ‘./myapp’
run Sinatra::Application
[/code]
[code lang=”css”]
#Contains database configuration – Kyle M. Brown
#Sets development database to sqlite
configure :development do
set :database, ‘sqlite:///dev.db’
set :show_exceptions, true
end
#Sets production database to postgreSQL
configure :production do
db = URI.parse(ENV[‘DATABASE_URL’] || ‘postgres:///localhost/mydb’)
ActiveRecord::Base.establish_connection(
:adapter => db.scheme == ‘postgres’ ? ‘postgresql’ : db.scheme,
:host => db.host,
:username => db.user,
:password => db.password,
:database => db.path[1..-1],
:encoding => ‘utf8’
)
end
[/code]
[code lang=”css”]
# myapp.rb
#This file is the core of the application – Kyle M. Brown
#ActiveRecord is an ORM (Object Relational Mapping (ORM). It does the translations between Ruby objects and the database which deals with records and relations.
require ‘sinatra’
require ‘sinatra/activerecord’
require ‘./database-config’
class Post < ActiveRecord::Base
end
[/code]
[code lang=”html”]
# Rakefile
#<a href="http://guides.rubyonrails.org/command_line.html#rake" target="_blank">Rake</a> is a build tool, written in Ruby, using Ruby as a build language. Rake is similar to make in scope and purpose. Rake a simple ruby build program with capabilities similar to make.
#ActiveRecord with be used for <a href="http://guides.rubyonrails.org/migrations.html" target="_blank">migrations</a>.
require ‘./myapp’
require ‘sinatra/activerecord/rake’
[/code]
Note:Look in your project folder and you should see a new folder called “db” and within that folder another folder called “migrate.” You should also see a Ruby script with a timestamp in the name. e.g.”
[code lang=”html”]
#The up method is used when we complete the migration (rake db:migrate), while the down method is ran when we rollback the last migration (rake db:rollback)
class CreatePosts < ActiveRecord::Migration
def self.up
create_table :posts do |t|
t.string :title
t.text :body
t.timestamps
end
end
def self.down
drop_table :posts
end
end
[/code]
Note:ActiveRecord created these table columns: id, title, body, created_at, updated_at. When a new post is created, only the title and body; needs to be specified. The remaining fields are generated automatically by ActiveRecord.
TUX
[code lang=”html”]
$ tux
>> Post.create(title: ‘Testing the title’, body: ‘Lorem ipsum dolor sit amet, consectetur adipiscing elit. Vestibulum venenatis eros eget lectus hendrerit, sed mattis quam pretium. Aenean accumsan eget leo non cursus. Aliquam sagittis luctus mi, quis suscipit neque venenatis et. Pellentesque vitae elementum diam. Quisque iaculis eget neque mattis fermentum. Donec et luctus eros. Suspendisse egestas pharetra elit vel bibendum.’)
>>
[/code]
Note:Something similar to the following should be returned in the terminal:
[code lang=”html”]
D, [2014-01-07T00:58:13.056397 #8573] DEBUG — : (0.2ms) begin transaction
D, [2014-01-07T00:58:13.069284 #8573] DEBUG — : SQL (6.5ms) INSERT INTO "posts" ("body", "created_at", "title", "updated_at") VALUES (?, ?, ?, ?) [["body", "Lorem ipsum dolor sit amet, consectetur adipiscing elit. Vestibulum venenatis eros eget lectus hendrerit, sed mattis quam pretium. Aenean accumsan eget leo non cursus. Aliquam sagittis luctus mi, quis suscipit neque venenatis et. Pellentesque vitae elementum diam. Quisque iaculis eget neque mattis fermentum. Donec et luctus eros. Suspendisse egestas pharetra elit vel bibendum."], ["created_at", 2014-01-07 05:58:13 UTC], ["title", "Testing the title"], ["updated_at", 2014-01-07 05:58:13 UTC]]
D, [2014-01-07T00:58:13.070767 #8573] DEBUG — : (1.0ms) commit transaction
=> #<Post id: 1, title: "Testing the title", body: "Lorem ipsum dolor sit amet, consectetur adipiscing …", created_at: "2014-01-07 05:58:13", updated_at: "2014-01-07 05:58:13">
>>
[/code]
GIT – Version Control
[code lang=”html”]
$ git init
$ git add .
$ git commit -am "initial commit"
[/code]
Templates
[code lang=”html”]
#Setup the route for the index page.
get "/" do
@posts = Post.order("created_at DESC")
@title = "Welcome."
erb :"posts/index"
end
[/code]
Note:This maps the “/” url to the template index.html (index.erb in Ruby terms)
[code lang=”html”]
#Sets the variable for the title.
helpers do
def title
if @title
"#{@title}"
else
"Welcome."
end
end
end
[/code]
[code lang=”html”]
<!– Template for index.erb //–>
<ul>
<% @posts.each do |post| %>
<li>
<h4><a href="/posts/<%= post.id %>"><%= post.title %></a></h4>
<p>Created: <%= post.created_at %></p>
</li>
<% end %>
</ul>
[/code]
Note: This file will serve as the parent template for all of the other templates in the application. Your child templates, such as index.erb inherent the HTML and CSS from the parent template.
Note: The opening and closing html tags.
Note: The yield tag (<% yield %>) is where other templates will embed.
[code lang=”html”]
<html>
<head>
<title><%= title %></title>
</head>
<body>
<ul>
<li><a href="/">Home</a></li>
<li><a href="/posts/create">New Post</a></li>
</ul>
<%= yield %>
</body>
</html>
[/code]
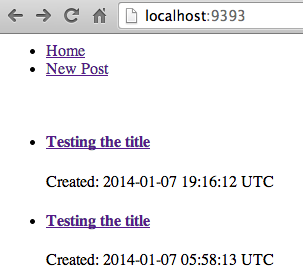
REFRESH – You should now see something in your browser similar to the image below:
[code lang=”css”]
get "/posts/:id" do
@post = Post.find(params[:id])
@title = @post.title
erb :"posts/view"
end
[/code]
[code lang=”css”]
<h1><%= @post.title %></h1>
<p><%= @post.body %></p>
[/code]
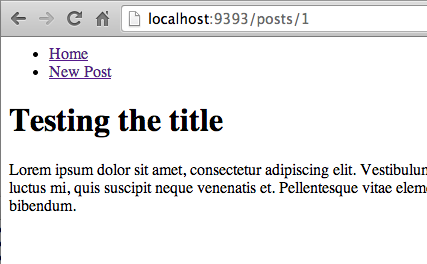
REFRESH Then click one of your titles and you should see an image similar to the one below:
[code]
get "/posts/create" do
@title = "Create post"
@post = Post.new
erb :"posts/create"
end
post "/posts" do
@post = Post.new(params[:post])
if @post.save
redirect "posts/#{@post.id}"
else
erb :"posts/create"
end
end
[/code]
[code lang=”css”]
<h2>Create Post</h2>
<br/>
<form action="/posts" method="post"role="form">
<div class="form-group">
<label for="post_title">Title:</label>
<br>
<input id="post_title" class="form-control" name="post[title]" type="text" value="<%= @post.title %>" style="width=90%"/>
</div>
<div class="form-group">
<label for="post_body">Body:</label>
<br>
<textarea id="post_body" name="post[body]" class="form-control" rows="10"><%= @post.body %></textarea>
</div>
<button type="submit" class="btn btn-success">Submit</button>
</form>
[/code]
Note: This is what your code should look like at this point. # tags are optional.
[code lang=”css”]
# myapp.rb
#This file is the core of the application – Kyle M. Brown
#ActiveRecord is an ORM (Object Relational Mapping (ORM). It does the translations between Ruby objects and the database which deals with records and relations.
require ‘sinatra’
require ‘sinatra/activerecord’
require ‘./database-config’
class Post < ActiveRecord::Base
end
#Setup the route for the index page.
get "/" do
@posts = Post.order("created_at DESC")
@title = "Welcome."
erb :"posts/index"
end
#Sets the variable for the title.
helpers do
def title
if @title
"#{@title}"
else
"Welcome."
end
end
end
#Setup the route for the create post when clicked link.
get "/posts/create" do
@title = "Create post"
@post = Post.new
erb :"posts/create"
end
post "/posts" do
@post = Post.new(params[:post])
if @post.save
redirect "posts/#{@post.id}"
else
erb :"posts/create"
end
end
#Setup the route for the post (title) link when clicked.
get "/posts/:id" do
@post = Post.find(params[:id])
@title = @post.title
erb :"posts/view"
end
[/code]
REFRESH – At this point you should have a working application that is running locally on your Mac where every link is clickable and functioning without error. From this point forward, we will be working on optional items such as error messages and validation, styling and some light security before pushing to heroku for the world to see.
Error Messages and validation
[code lang=”html”]
#Error and validation handling
require ‘sinatra/flash’
require ‘sinatra/redirect_with_flash’
enable :sessions
[/code]
[code lang=”css”]
class Post < ActiveRecord::Base
end
[/code]
with
[code lang=”css”]
class Post < ActiveRecord::Base
validates :title, presence: true, length: { minimum: 5 }
validates :body, presence: true
end
[/code]
[code lang=”css”]
post "/posts" do
@post = Post.new(params[:post])
if @post.save
redirect "posts/#{@post.id}"
else
erb :"posts/create"
end
end
[/code]
with
[code lang=”css”]
post "/posts" do
@post = Post.new(params[:post])
if @post.save
redirect "posts/#{@post.id}", :notice => ‘Congrats! Love the new post. (This message will disappear in 4 seconds.)’
else
redirect "posts/create", :error => ‘Something went wrong. Try again. (This message will disappear in 4 seconds.)’
end
end
[/code]
[code lang=”css”]
<% if flash[:notice] %>
<p class="alert alert-success"><%= flash[:notice] %>
<% end %>
<% if flash[:error] %>
<p class="alert alert-error"><%= flash[:error] %>
<% end %>
[/code]
REFRESH – At this point you should see an error message when an attempt is made to submit a post title with less than 3 characters or when either empty title or content fields are submitted.
Styling with Bootstrap
[code lang=”html”]
<!DOCTYPE html>
<html lang="en">
<head>
<meta charset="utf-8">
<meta name="viewport" content="width=device-width, initial-scale=1.0">
<meta name="description" content="">
<meta name="author" content="">
<title><%= title %></title>
<link href="http://netdna.bootstrapcdn.com/bootstrap/3.0.0/css/bootstrap.min.css" rel="stylesheet">
<style>
body {
padding-top: 75px;
}
.starter-template {
padding: 40px 15px;
text-align: center;
}
.container {
max-width:1000px;
}
</style>
</head>
<body>
<div class="navbar navbar-default navbar-fixed-top">
<div class="container">
<div class="navbar-header">
<button type="button" class="navbar-toggle" data-toggle="collapse" data-target=".navbar-collapse">
<span class="icon-bar"></span>
<span class="icon-bar"></span>
<span class="icon-bar"></span>
</button>
<a class="navbar-brand" href="/">Kyles blog</a>
</div>
<div class="collapse navbar-collapse">
<ul class="nav navbar-nav">
<li class="active"><a href="/">Home</a></li>
</ul>
</div><!–/.nav-collapse –>
</div>
</div>
<div class="container">
<a href="/posts/create"><button type="button" class="btn btn-primary">New Post</button></a>
<% if flash[:notice] %>
<p class="alert alert-success"><%= flash[:notice] %>
<% end %>
<% if flash[:error] %>
<p class="alert alert-warning"><%= flash[:error] %>
<% end %>
<%= yield %>
</div><!– /.container –>
<!– Bootstrap core JavaScript
================================================== –>
<!– Placed at the end of the document so the pages load faster –>
<script src="http://code.jquery.com/jquery-1.10.2.min.js"></script>
<script src="http://getbootstrap.com/dist/js/bootstrap.min.js"></script>
<script>
//** removes alerts after 4 seconds */
window.setTimeout(function() {
$(".alert").fadeTo(4500, 0).slideUp(500, function(){
$(this).remove();
});
}, 4000);
</script>
</body>
</html>
[/code]
[code lang=”html”]
$ git add .
$ git commit -am "updated"
[/code]
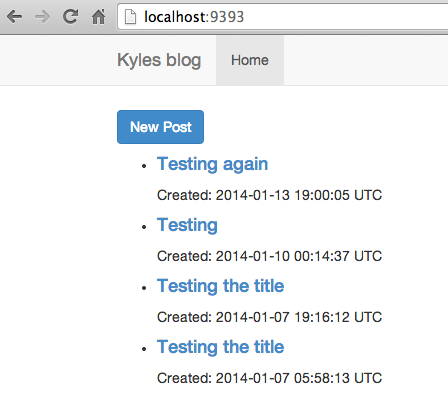
REFRESH You should now see a freshly redesigned app as seen below:
Editing Post function
[code lang=”css”]
#Set the route to edit post (both get and post)
get "/posts/:id/edit" do
@post = Post.find(params[:id])
@title = "Edit Form"
erb :"posts/edit"
end
put "/posts/:id" do
@post = Post.find(params[:id])
@post.update(params[:post])
redirect "/posts/#{@post.id}"
end
[/code]
[code lang=”html”]
<h2>Edit Post</h2>
<br/>
<form action="/posts/<%= @post.id %>" method="post">
<div class="form-group">
<input type="hidden" name="_method" value="put" />
<label for="post_title">Title:</label>
<br>
<input id="post_title" class="form-control" name="post[title]" type="text" value="<%= @post.title %>" />
</div>
<div class="form-group">
<label for="post_body">Body:</label>
<br>
<textarea id="post_body" name="post[body]" class="form-control" rows="5"><%= @post.body %></textarea>
</div>
<button type="submit" class="btn btn-success">Submit</button>
</form>
[/code]
[code lang=”html”]
<h1><%= @post.title %></h1>
<p><%= @post.body %></p>
[/code]
with
[code lang=”html”]
<h1><%= @post.title %></h1>
<p><%= @post.body %></p>
<br>
<a href="/posts/<%= @post.id %>/edit"><button type="button" class="btn btn-default btn-xs">Edit Post</button></a>
[/code]
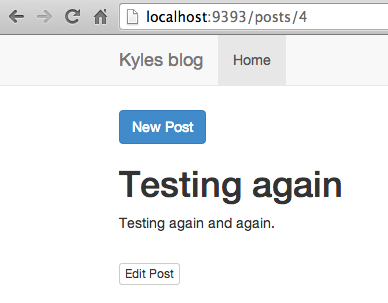
REFRESH – At this point the apps “edit” function, as seen after clicking on a post title, should allowing existing post editing when clicked.
Security
[code lang=”html”]
helpers do
include Rack::Utils
alias_method :h, :escape_html
end
[/code]
[code lang=”html”]
<h1><%=h @post.title %></h1>
<p><%=h @post.body %></p>
<br>
<a href="/posts/<%= @post.id %>/edit"><button type="button" class="btn btn-default btn-xs">Edit Post</button></a>
[/code]
Note: You are basically adding an ‘h’ after 2 of the “<%=" symbols.
[code lang=”css”]
<h2>Edit Post</h2>
<br/>
<form action="/posts/<%= @post.id %>" method="post" role="form">
<div class="form-group">
<input type="hidden" name="_method" value="put" />
<label for="post_title">Title:</label>
<br>
<input id="post_title" class="form-control" name="post[title]" type="text" value="<%=h @post.title %>" />
</div>
<div class="form-group">
<label for="post_body">Body:</label>
<br>
<textarea id="post_body" name="post[body]" class="form-control" rows="5"><%=h @post.body %></textarea>
</div>
<button type="submit" class="btn btn-success">Submit</button>
</form>
[/code]
Note: You are basically adding an ‘h’ after the “<%=" symbols for the input tags.
[code lang=”html”]
<!– Template for index.erb //–>
<ul>
<% @posts.each do |post| %>
<li>
<h4><a href="/posts/<%= post.id %>"><%=h post.title %></a></h4>
<p>Created: <%=h post.created_at %></p>
</li>
<% end %>
</ul>
[/code]
Note: You are basically adding an ‘h’ after 2 of the “<%=" symbols.
[code lang=”html”]
$ git add .
$ git commit -am "updated"
[/code]
REFRESH – You should no longer be able to execute html tags. If entered will be treated as text. e.g.:
[code lang=”html”]
<script>alert("haha")</script>
[/code]
Heroku
Note:You must have a Heroku account and you Mac must be setup. See the heroku section in my previous post.
[code lang=”html”]
$ heroku create kyle-blog
$ git push heroku master
[/code]
Note: You terminal should look something like the image below. There will be much more than seen here after you run git push heroku master.

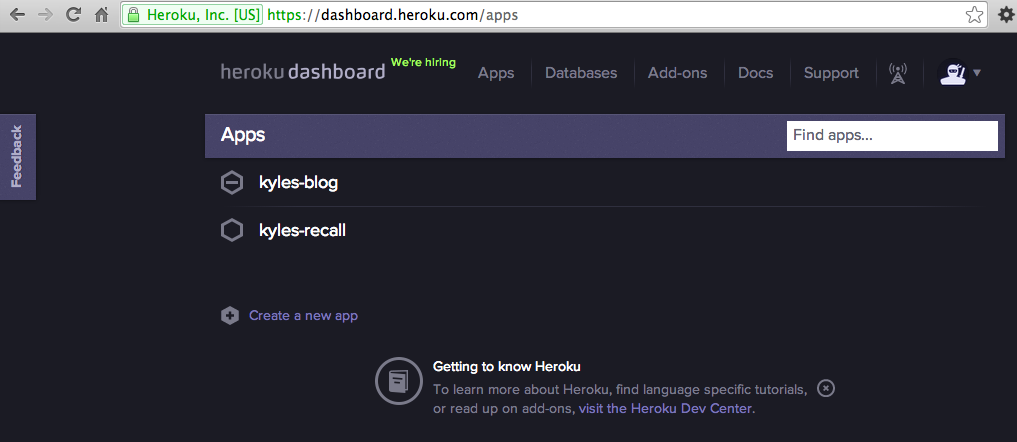
Note: At your heroku dashboard, you should see your new app on the “heroku.com/apps” page similar to the image below.
Final Product
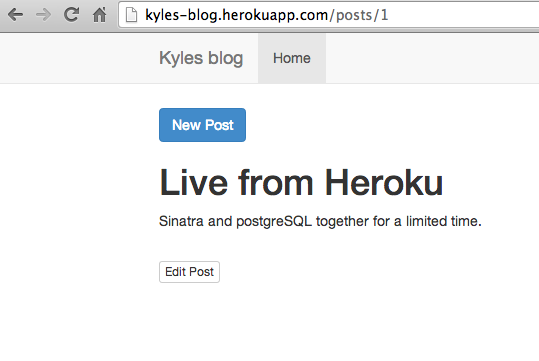
See the app live at heroku: http://kyles-blog.herokuapp.com/
Optionally you can push the code to github to house your code in the cloud for sharing.
Note: In this example I already have a github account (Learn how to create one). I have already created a repository at github for kyles-blog(Learn how to create one) and my Mac is already setup (Learn how here) to work with github. You must have these things completed before using the following code:
[code lang=”css”]
git remote add origin https://github.com/kmb40/kyles-blog.git
git push -u origin master
[/code]
Get the code @ : https://github.com/kmb40/kyles-blog
Well thats it. We accomplished the following task:
- Created a blog app locally on a Mac in Sinatra with a sqlite database.
- Add error and validation function and messages.
- Added some security to prevent XSS.
- Deployed the final app to heroku for the public to see.
- Pushed the files to github for the public to use.
I hope that this is as useful to you as it was to me.
Please forward any comments or questions.
*This tutorial was inspired by another tutorial here.