 The beginning – March 23, 2013
This is a series of short stories about my experience working toward learning Ruby on Rails before the end of 2013.
Note: This journey actually started in February 2013 but I didn’t start blogging about it until March 23, 2013.
Background
I am a self-taught programmer. I started in the 80’s with a commodore 64. Actually, I would honestly consider myself more of a hacker. And by that I mean someone who can put things together and make them work to achieve an objective. It’s always worked well for me.
So I started hearing about Ruby on Rails a few years ago and thought to myself, here comes the PHP replacement. It was that type of buzz but I never took a close look at it because I was to busy and didn’t plan on learning a new language.
PHP had been my language of choice for years and I didn’t see any reason to change that, though you have to stay flexible when it comes to technology, specifically programming.
At any rate, when I left the day job I decided that I would dedicate more time to programming because its something that I have always enjoyed and wanted to do more of but never had the time between family and work.
February 1, 2013
Based on previous experiences where I had set up local testing environments for coding such as XAMPP, I thought that hosting for Ruby on Rails was my first task, so that I would have a development environment to test in. So, I found several referrals for https://www.heroku.com/ and a few more for https://www.appfog.com/.
However, after spending some time configuring these solutions and connecting GITHUB (a social version control storage place for code, popular in the Rails community), I discovered that I was spending too much time learning how to set up a Rails hosting environment instead of learning how to program it.
So after looking around for tutorials I decided to try http://tryruby.org/ . After a few minutes, I felt that learning rails was going to be easier than I thought. Primarily because of my previous experience programming, terms and structure came easy. Which was exciting because it meant I wasn’t starting from scratch the way that I had imagined.
Terminology
![]() At some point while attending a startup event, I learned that Ruby is a programming language and Rails is a Framework built upon that programming language. Ruby on Rails also known as Rails or ROR is the correct terminology to describe what I am learning. Although I had already started learning Ruby, I preferred to learn the base language prior to learning a framework as a general rule, so It didn’t really matter. I was on my way.
At some point while attending a startup event, I learned that Ruby is a programming language and Rails is a Framework built upon that programming language. Ruby on Rails also known as Rails or ROR is the correct terminology to describe what I am learning. Although I had already started learning Ruby, I preferred to learn the base language prior to learning a framework as a general rule, so It didn’t really matter. I was on my way.
February 23, 2103
![]() After looking at several Google search query results for tutorials and reading different rags. I decided to begin learning Ruby with Codecademy. I liked the user interface of their site, the lessons were compact and the forums were active. All things that I knew would be valuable in learning to program, especially the active forums.
After looking at several Google search query results for tutorials and reading different rags. I decided to begin learning Ruby with Codecademy. I liked the user interface of their site, the lessons were compact and the forums were active. All things that I knew would be valuable in learning to program, especially the active forums.
Feb 26, 2013
And so I started learning Ruby at Codecademy. The early lessons had my attention. So much so that I completed 9 lessons in 9 days with a 9 day streak (Codecademy feature). A lot of what I saw was familiar.
Things like conditional, arrays, variables all looked familiar. Suddenly this looked as if it were going to be easier than Id thought.
June 10, 2013
Basically I completed every lesson offered by Codecademy on Ruby. It had taken just under 4 months of dedicating a few minutes up to and a couple of hours per day.
July 3, 2013
I was once asked by a Network Design Instructor, “Do you know the best way to learn something?” It’s not reading books and not attending instructor lead classes.” My response was, “Well what is it?” He replied, “Its teaching someone else.”
I had not heard that prior to this day. It made sense to me but I didn’t think much more of it at the time. Going forward, I began to observe what Id been told.
So much so that I started to build training others into anything that I had or was learning and that’s what I plan to do with Rails here. Hopefully you will benefit from this as well.
July 4, 2013
Setting up Rails on a MacBook Air for local testing
I followed the instructions located @ http://guides.rubyonrails.org/getting_started.html . Mac’s come with Ruby Installed and I had previously checked my MacBook but it had been sometime and I wanted to make sure I had the most current version running.
So first I checked the current version listed at http://guides.rubyonrails.org/getting_started.html which at the time of this post is 4.0.
- Launch the Applications -> Terminal application.
- Type “ruby -v” at the command line. You should see something like “ruby 1.9.3p0 (2011-10-30 revision 33570) [x86_64-darwin11.3.0]”
- Next I checked to see if Rails was installed by typing in the syntax “rails –version” to check the version. You should see something like “Rails 3.2.1”
- I like to run the most current version of any software, especially when learning it from scratch. So I installed the latest version by typing “gem install rails” at the command line. You should see several rows of text containing commands for different things runny automatically.
- Once that completes, type “rails -v” again to check that the Rails version was updated to the most current. You should see something like “Rails 4.0.0”
July 5, 2013
Setting up Rails at a web host
I needed to set up an environment in the cloud that could host Rails applications. I found several in addition to those referenced in February section of this post. Site5 provides hosting for Rails and I already had an account here so I decided to use their hosting.
NOTE: There really wasn’t much to set up. Rails is already installed on Site5 accounts so all I did was check the version to confirm.
- SSH into the hosting account.
- Type “rails –v” to check that the Rails version. You should see something like “Rails 4.0.0” What I got was 2.3.17 because that is the version they are currently running.
July 7, 2013
Building a Rails application
November 13, 2013
Its been a couple of months since I updated this topic. Part of the time was spent testing mobile game development. I also traveled out of the country. During this time frame, I was thinking about Rails and looking at some methods of learning enough to create a working project built-in Rails by years end.
I heard about a site called One month rails through a group of entrepreneurs that I communicate with regularly. What caught my attention is the one month duration. If the curriculum is structured to be completed in that time frame with a working project, then its a good fit. This would help me get to a completed Rails application by years end. I spoke to someone at the site and it sounds like something I may try it.
November 30, 2013
 I started looking into reviews of One month rails and a few other notable sites for learning Rails as a final look before committing and getting started before this year ends. I felt that before I stared learning, I wanted to get a better grip on GIT and GIT hub. I found a good explanation at Stackoverflow entitled “Understanding the basics between GIT and GITHUB.”
I found this site at http://rogerdudler.github.io/git-guide/ useful for getting started with GIT without a lot of noise. There were also other starter resources available at http://onvard.com/tracks/best-way-to-learn-ruby-on-rails-for-absolute-beginners-part-1
One of my take away’s is that GIT is for local version control and GITHUB is for sharing those versions with other GIT users.
Here are the steps that I practiced to get up and running with GIT.
- Download GIT for MAC @ http://code.google.com/p/git-osx-installer/downloads/list?can=3
- Launch the Terminal.
- Create a Directory – You can use “mkdir pathtoyourdirectoryname” at the command prompt.
- Clone your repository ( Create a working copy of a local repository) – You would use “git clone /pathtoyourdirectoryname/.git/”. ( Create a remote copy of a local repository) – You would use “git clone username@host:/path/to/repository”
- GIT Structure (Workflow)
The Working Directorywhich holds the actual files.The Indexwhich acts as a staging.The HEADwhich points to the last commit you’ve made.
- Adding files and changes (Add & Commit) – sends changes to the Index/staging environment using code “git add ” OR “git add *”. Commit changes (send the changes to the Head) using “git commit -m “Commit message” .”
- Pushing changes – Use “git push origin yourbranchname” to push changes from the Head to a remote repository. If you have not cloned your repository then use “git remote add origin ” to create one.
- Branch – Develop features for your app that are independent of the master (production) and each other. Use “git checkout -b feature-a” to create a branch with a new feature and switch to it. Use “git checkout master” to switch back to the master. Use “git branch -d feature-a” to delete the branch. Note: The feature will not be available in the remote repository unless you push it there using “git push origin”
- Update | Merge – To fetch and merge changes execute by executing “git pull” in the working directory. Use “git merge <branch>” to merge another branch into your active branch (master). Note: This is not always possible and results in conflicts. You are responsible to merge those conflicts manually by editing the files shown by git. After changes are complete use “git add <filename>” as seen in step 6. Changes can be previewed prior to committing using “git diff <source_branch> <target_branch>”.
- Tags – Track versions using “git tag 1.0.0 123abc” where 123abc is the first 10 character of the commit id. Check the versions using “git log”
- Replace – If mistakes were made and your local files need to be replaced use “git checkout — <filename>”. Note: this replaces the changes in your working tree with the last content in HEAD. Changes already added to the index, as well as new files, will be kept. To drop(replace) ALL of your local changes and commits use “git fetch origin” and “git reset –hard origin/master” which will fetch the latest history from the server and point your local master branch at it.
December 3, 2013
Enter Sinatra
![]()
Just before I dove into one month rails, I decided to do some more research and found a trend that suggested giving “Sinatra” a shot prior to Rails. Sinatra has been described as a domain specific language and web library and a framework by some. Most of what I read seemed to suggest that rails was complex as compared to Sinatra. At least when it comes to beginners. Having prior programming knowledge I can appreciate that feeling because for me, putting together and taking apart projects in smaller pieces gives me a solid grasp of what I can do with a language.
Even though Im less than 30 days away from my goal of completing a working Rails application, I am fairly confident that I can get through some Sinatra and still make my deadline.
December 4, 2013
Much of what I have found online in the way of command line coding tutorials is not very reader friendly. I believe a lot of this has to do with the fact the that code syntax is text based. So I will do my best to make it concise and easy to follow.
Required Gems
You will need to install the following gem for sinatra
[code]gem install sinatra[/code]
Optionally you can install the “shotgun” gem. Sinatra file changes require the server to be restarted before they update. This gem allows changes to be displayed after refreshing the browser.
[code]gem install shotgun[/code]
Sinatra – Hello World
Objective: Create a hello world app.
- Open TextMate and create a new file and save it in your rails directory as ” helloworld.rb”
- Write “require ‘sinatra'” at the top of the file. (without edge quotes)
- Note: If you’re running Ruby 1.9 then you should not need to use “require ‘rubygems'” as they are included already.
- Add ” get ‘/’ do
“Hello, World!”
end” (without edge quotes) - Save the file in TextMate.
- Open up the Terminal (command line for MAC).
- Type “cd” to reach the directory where your file “helloword.rb” is saved. For example if you have a directory named “myrailscode” then you’d type “cd myrailscode” at the command line prompt.
- At the command line type “rails helloworld.rb”. This will start the local server on your MAC.
- Open your browser and type “http://localhost:4567/” to see what you’ve done. You should see a white page with “Hello, World!” in the upper left hand corner.
- This task should be complete. Note: Press “Control + C” to shut down the server.
Sinatra – Forms
Objective: Create a form.
- Open TextMate and create a new file. You will save it in your app directory (in Step 3) as ” webform.rb”
- Write “require ‘sinatra'” at the top of the file. (without edge quotes)
- Note: If you’re running Ruby 1.9 then you should not need to use “require ‘rubygems'” as they are included already.
[code lang=”ruby”]
#This is what you should have
require ‘sinatra’get ‘/form’ do
erb :form
endpost ‘/form’ do
&quot;You said ‘#{params[:message]}’&quot;
end[/code]
- Note: If you’re running Ruby 1.9 then you should not need to use “require ‘rubygems'” as they are included already.
- Create a directory for your app.
- Create a sub directory within that directory named “views”.
- Create a file named “form.erb” inside of the “views” directory.
- Add
[code lang=”html”]
&lt;form action=&quot;/form&quot; method=&quot;post&quot;&gt;&lt;input type=&quot;text&quot; name=&quot;message&quot; /&gt;
&lt;input type=&quot;submit&quot; /&gt;&lt;/form&gt;
[/code] - Save the file in TextMate.
- Open up the Terminal (command line for MAC).
- Type “cd” to reach the directory where your file “webform.rb” is saved. For example if you have a directory named “myrailscode” then you’d type “cd myrailscode” at the command line prompt.
- At the command line type “rails webform.rb”. This will start the local server on your MAC.
- Open your browser and type “http://localhost:4567/form” to see what you’ve done. You should see a white page with a form and a submit button in the upper left hand corner.
- This task should be complete. Note: Press “Control + C” to shut down the server.
Cranking up the Rails server (local) on your MAC
- rails new path/to/your/new/application
- cd path/to/your/new/application
- rails server
- Visit http://localhost:3000/ in your browser Note: Press CTRL + C to shut down the sever.
Note: In the event that you don’t recall every project you create at the terminal command line, you can find the folders that you create at the terminal using the finder at /user/, look for files ending “.rb”.
December 5, 2013
Sinatra has been simple up to this point. For my next act, I want to attempt to build a small application that uses CREATE, RETRIEVE, UPDATE, DELETE functionality. I decided to build a note taking application following this tutorial (Note: I tend to variate during tutorials with my own experiments so if you are following along, some things may not line up). The primary differences between this and the other two sample applications that I created are that this will require a database of some type and this application will be more like something you would see being used in the real world.
Issues – I ran into a major issue when attempting to execute this command
[code]gem install sqlite3 datamapper dm-sqlite-adapter[/code]
. I spent a couple of hours trying to resolve this issue. I tried preceding the command with “sudo”, I even considered moving from RVM to rbenv which at the time of this writing is recommended by RubyonRails.org. Solution – In the end I resolved the issue by updating to Ruby 2.0.0. Here is how I did it: My environment: MacBook Air running, OS X 10.8.5
- I had to install command line tools because it isn’t included in Xcode 5 which is what I am running. I don’t recall at which point I received the error that sent me down this road but I do recall that it worked. This can be done through X Code. Use this Stack explanation.
- Using Homebrew to update from Ruby 19.8 to Ruby to 2.0.0.
- I reached Homebrew by opening the standard terminal.
- Click “Shell” –> “New Tab” –> “Homebrew”.
- Enter
[code]rvm install 2.0.0[/code]
.
- It took about 10 minutes to complete so be patient.
- Important – set the default Ruby version to 2.0.0 using
[code]rvm use –default 2.0.0[/code]
Recall
Objective: Create a note taking app.
- Open TextMate and create a new file. You will save it in your app directory (in Step 3) as ” recall.rb”
- Write “require ‘sinatra'” at the top of the file. (without edge quotes)
- Note: If you’re running Ruby 1.9 then you should not need to use “require ‘rubygems'” as they are included already.
[code lang=”css”]
require ‘sinatra’
require ‘data_mapper’
DataMapper::setup(:default, &quot;sqlite3://#{Dir.pwd}/recall.db&quot;)
class Note
include DataMapper::Resource
property :id, Serial
property :content, Text, :required =&gt; true
property :complete, Boolean, :required =&gt; true, :default =&gt; false
property :created_at, DateTime
property :updated_at, DateTime
end
DataMapper.finalize.auto_upgrade!
get ‘/’ do
@notes = Note.all .:order =&gt; :id.desc //remove the ‘.’ before ‘:order’ Had to add it to get WordPress to display properly
@title = ‘All Notes’
erb :home
end[/code]
- Create a directory for your app.
- Create a sub directory within that directory named “views”.
- Create a file named “home.erb” inside of the “views” directory.
- Add
[code lang=”html”]
&lt;section id=&quot;add&quot;&gt;
&lt;form action=&quot;/&quot; method=&quot;post&quot;&gt;
&lt;textarea name=&quot;content&quot; placeholder=&quot;Your note…&quot;&gt;
&lt;input type=&quot;submit&quot; value=&quot;Take Note!&quot; /&gt;
&lt;/form&gt;
&lt;/section&gt;
&lt;% # display notes %&gt;[/code] - Save the file in TextMate.
- Open up the Terminal (command line for MAC).
- Type “cd” to reach the directory where your file “recall.rb” is saved. For example if you have a directory named “myrailscode” then you’d type “cd myrailscode” at the command line prompt.
- At the command line type “rails recall.rb”. This will start the local server on your MAC.
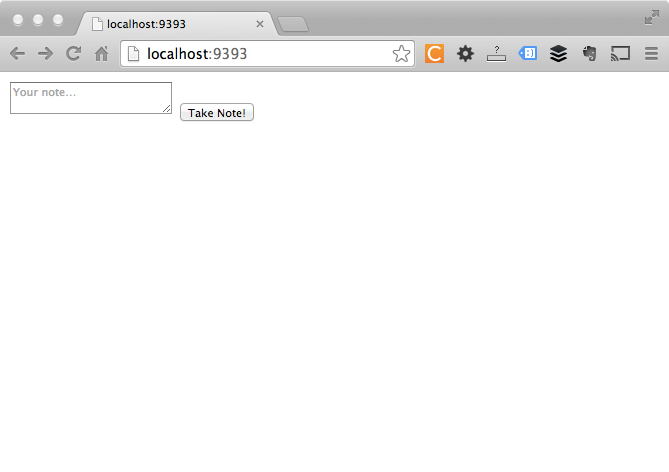
- Open your browser and type “http://localhost:4567” to see what you’ve done. You should see a white page with a multi line form and a take note button in the upper left hand corner.
- Next we are going to continue designing the app.
- Create a new file named layout.erb and save it into the views folder. Use the following code:
[code lang=”css”]
&lt;!doctype html&gt;
&lt;html lang=&quot;en&quot;&gt;
&lt;head&gt;
&lt;meta charset=&quot;utf8&quot;&gt;
&lt;title&gt;&lt;%= @title + ‘ | Recall’ %&gt;&lt;/title&gt;
&lt;link href=&quot;/reset.css&quot; rel=&quot;stylesheet&quot;&gt;
&lt;link href=&quot;/style.css&quot; rel=&quot;stylesheet&quot;&gt;
&lt;/head&gt;
&lt;body&gt;
&lt;header&gt;
&lt;hgroup&gt;
&lt;h1&gt;&lt;a href=&quot;/&quot;&gt;Recall&lt;/a&gt;&lt;/h1&gt;
&lt;h2&gt;’cause you’re too busy to remember&lt;/h2&gt;
&lt;/hgroup&gt;
&lt;/header&gt;
&lt;div id=&quot;main&quot;&gt;
&lt;%= yield %&gt;
&lt;/div&gt;
&lt;footer&gt;
&lt;p&gt;&lt;small&gt;An app for &lt;a href=&quot;http://net.tutsplus.com&quot;&gt;Nettuts+&lt;/a&gt;.&lt;/small&gt;&lt;/p&gt;
&lt;/footer&gt;
&lt;/body&gt;
&lt;/html&gt;
[/code]
- Run shotgun so that you can test the code without restarting the server.
[code lang=”html”]shotgun recall.rb[/code]
- Next we will add some styling with CSS. Create a folder in the root of the app directory named “public”.
- Create two CSS files as follows inside of the directory, reset.css and style.css
- Place the following CSS in the “reset.css” file and save.
[code lang=”css”]
/*
HTML5 ✰ Boilerplate
style.css contains a reset, font normalization and some base styles.
credit is left where credit is due.
much inspiration was taken from these projects:
yui.yahooapis.com/2.8.1/build/base/base.css
camendesign.com/design/
praegnanz.de/weblog/htmlcssjs-kickstart
*/
/*
html5doctor.com Reset Stylesheet (Eric Meyer’s Reset Reloaded + HTML5 baseline)
v1.6.1 2010-09-17 | Authors: Eric Meyer &amp; Richard Clark
html5doctor.com/html-5-reset-stylesheet/
*/
html, body, div, span, object, iframe,
h1, h2, h3, h4, h5, h6, p, blockquote, pre,
abbr, address, cite, code, del, dfn, em, img, ins, kbd, q, samp,
small, strong, sub, sup, var, b, i, dl, dt, dd, ol, ul, li,
fieldset, form, label, legend,
table, caption, tbody, tfoot, thead, tr, th, td,
article, aside, canvas, details, figcaption, figure,
footer, header, hgroup, menu, nav, section, summary,
time, mark, audio, video {
margin:0;
padding:0;
border:0;
font-size:100%;
font: inherit;
vertical-align:baseline;
}
article, aside, details, figcaption, figure,
footer, header, hgroup, menu, nav, section {
display:block;
}
blockquote, q { quotes:none; }
blockquote:before, blockquote:after,
q:before, q:after { content:”; content:none; }
ins { background-color:#ff9; color:#000; text-decoration:none; }
mark { background-color:#ff9; color:#000; font-style:italic; font-weight:bold; }
del { text-decoration: line-through; }
abbr[title], dfn[title] { border-bottom:1px dotted; cursor:help; }
table { border-collapse:collapse; border-spacing:0; }
hr { display:block; height:1px; border:0; border-top:1px solid #ccc; margin:1em 0; padding:0; }
input, select { vertical-align:middle; }
/* END RESET CSS */
/* font normalization inspired by from the YUI Library’s fonts.css: developer.yahoo.com/yui/ */
body { font:13px/1.231 sans-serif; *font-size:small; } /* hack retained to preserve specificity */
select, input, textarea, button { font:99% sans-serif; }
/* normalize monospace sizing
* en.wikipedia.org/wiki/MediaWiki_talk:Common.css/Archive_11#Teletype_style_fix_for_Chrome */
pre, code, kbd, samp { font-family: monospace, sans-serif; }
/*
* minimal base styles
*/
body, select, input, textarea {
/* #444 looks better than black: twitter.com/H_FJ/statuses/11800719859 */
color: #444;
/* set your base font here, to apply evenly */
/* font-family: Georgia, serif; */
}
/* headers (h1,h2,etc) have no default font-size or margin. define those yourself. */
h1,h2,h3,h4,h5,h6 { font-weight: bold; }
/* always force a scrollbar in non-IE: */
html { overflow-y: scroll; }
/* accessible focus treatment: people.opera.com/patrickl/experiments/keyboard/test */
a:hover, a:active { outline: none; }
a, a:active, a:visited { color: #607890; }
a:hover { color: #036; }
ul, ol { margin-left: 2em; }
ol { list-style-type: decimal; }
/* remove margins for navigation lists */
nav ul, nav li { margin: 0; list-style:none; list-style-image: none; }
small { font-size: 85%; }
strong, th { font-weight: bold; }
td { vertical-align: top; }
/* set sub, sup without affecting line-height: gist.github.com/413930 */
sub, sup { font-size: 75%; line-height: 0; position: relative; }
sup { top: -0.5em; }
sub { bottom: -0.25em; }
pre {
/* www.pathf.com/blogs/2008/05/formatting-quoted-code-in-blog-posts-css21-white-space-pre-wrap/ */
white-space: pre; white-space: pre-wrap; white-space: pre-line; word-wrap: break-word;
padding: 15px;
}
textarea { overflow: auto; } /* www.sitepoint.com/blogs/2010/08/20/ie-remove-textarea-scrollbars/ */
.ie6 legend, .ie7 legend { margin-left: -7px; } /* thnx ivannikolic! */
/* align checkboxes, radios, text inputs with their label by: Thierry Koblentz tjkdesign.com/ez-css/css/base.css */
input[type=&quot;radio&quot;] { vertical-align: text-bottom; }
input[type=&quot;checkbox&quot;] { vertical-align: bottom; }
.ie7 input[type=&quot;checkbox&quot;] { vertical-align: baseline; }
.ie6 input { vertical-align: text-bottom; }
/* hand cursor on clickable input elements */
label, input[type=&quot;button&quot;], input[type=&quot;submit&quot;], input[type=&quot;image&quot;], button { cursor: pointer; }
/* webkit browsers add a 2px margin outside the chrome of form elements */
button, input, select, textarea { margin: 0; }
/* colors for form validity */
input:valid, textarea:valid { }
input:invalid, textarea:invalid {
border-radius: 1px; -moz-box-shadow: 0px 0px 5px red; -webkit-box-shadow: 0px 0px 5px red; box-shadow: 0px 0px 5px red;
}
.no-boxshadow input:invalid, .no-boxshadow textarea:invalid { background-color: #f0dddd; }
/* These selection declarations have to be separate.
No text-shadow: twitter.com/miketaylr/status/12228805301
Also: hot pink. */
::-moz-selection{ background: #FF5E99; color:#fff; text-shadow: none; }
::selection { background:#FF5E99; color:#fff; text-shadow: none; }
/* j.mp/webkit-tap-highlight-color */
a:link { -webkit-tap-highlight-color: #FF5E99; }
/* make buttons play nice in IE:
www.viget.com/inspire/styling-the-button-element-in-internet-explorer/ */
button { width: auto; overflow: visible; }
/* bicubic resizing for non-native sized IMG:
code.flickr.com/blog/2008/11/12/on-ui-quality-the-little-things-client-side-image-resizing/ */
.ie7 img { -ms-interpolation-mode: bicubic; }
[/code]
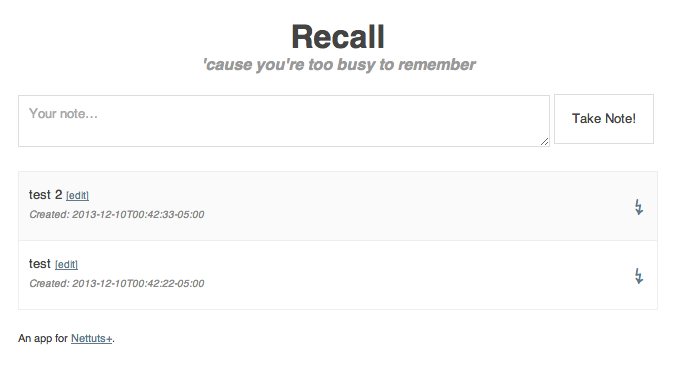
- You should refresh the browser to view the newly styled page. Note: If you do not notice any changes, then you may have missed something.

- Place the following CSS in the “style.css” file and save.
[code lang=”css”]
body {
margin: 35px auto;
width: 640px;
}
header {
text-align: center;
margin: 0 0 20px;
}
header h1 {
display: inline;
font-size: 32px;
}
header h1 a:link, header h1 a:visited {
color: #444;
text-decoration: none;
}
header h2 {
font-size: 16px;
font-style: italic;
color: #999;
}
#main {
margin: 0 0 20px;
}
#add {
margin: 0 0 20px;
}
#add textarea {
height: 30px;
width: 510px;
padding: 10px;
border: 1px solid #ddd;
}
#add input {
height: 50px;
width: 100px;
margin: -50px 0 0;
border: 1px solid #ddd;
background: white;
}
#edit textarea {
height: 30px;
width: 480px;
padding: 10px;
border: 1px solid #ddd;
}
#edit input[type=submit] {
height: 50px;
width: 100px;
margin: -50px 0 0;
border: 1px solid #ddd;
background: white;
}
#edit input[type=checkbox] {
height: 50px;
width: 20px;
}
article {
border: 1px solid #eee;
border-top: none;
padding: 15px 10px;
}
article:first-of-type {
border: 1px solid #eee;
}
article:nth-child(even) {
background: #fafafa;
}
article.complete {
background: #fedae3;
}
article span {
font-size: 0.8em;
}
p {
margin: 0 0 5px;
}
.meta {
font-size: 0.8em;
font-style: italic;
color: #888;
}
.links {
font-size: 1.8em;
line-height: 0.8em;
float: right;
margin: -10px 0 0;
}
.links a {
display: block;
text-decoration: none;
}
[/code]
- You should refresh the browser to view the newly styled page. Note: If you do not notice any changes, then you may have missed something. Re-read, check your code and try again.

- At this point any submitted (when the user clicks “Take Note” button) data will not be saved and will return an error page. Next we will add code to recall.rb that handles submitted information.
- Add the Post route to the recall.rb file as follows:
[code lang=”html”]
post ‘/’ do
n = Note.new
n.content = params[:content]
n.created_at = Time.now
n.updated_at = Time.now
n.save
redirect ‘/’
end
[/code]
- Now, when a user enters notes in the “your note” field and clicks the “Take notes” button, the notes are stored in the sqlite database.
- You should refresh the browser to view the page. Note: If you do not notice any changes, then you may have missed something. Re-read, check your code and try again.
- Now we will place the code required to pull and display the data that is submitted via the form from the database inside of the “views/home.erb” view file, replacing the <%# display notes %> tag.
[code lang=”css”]
&lt;% @notes.each do |note| %&gt;
&lt;article &lt;%= ‘class=&quot;complete&quot;’ if note.complete %&gt;&gt;
&lt;p&gt;
&lt;%= note.content %&gt;
&lt;span&gt;&lt;a href=&quot;/&lt;%= note.id %&gt;&quot;&gt;[edit]&lt;/a&gt;&lt;/span&gt;
&lt;/p&gt;
&lt;p class=&quot;links&quot;&gt;
&lt;a href=&quot;/&lt;%= note.id %&gt;/complete&quot;&gt;&amp;#8623;&lt;/a&gt;
&lt;/p&gt;
&lt;p class=&quot;meta&quot;&gt;Created: &lt;%= note.created_at %&gt;&lt;/p&gt;
&lt;/article&gt;
&lt;% end %&gt;
[/code]
- Now we will add the ability to edit notes. Place the following code inside of the “recall.rb” file
[code lang=”css”]
get ‘/:id’ do
@note = Note.get params[:id]
@title = &quot;Edit note ##{params[:id]}&quot;
erb :edit
end
[/code]
- Create a file inside of the “views” folder and name it “edit.erb”. Place the following code inside of it.
[code lang=”css”]
&lt;% if @note %&gt;
&lt;form action=&quot;/&lt;%= @note.id %&gt;&quot; method=&quot;post&quot; id=&quot;edit&quot;&gt;
&lt;input type=&quot;hidden&quot; name=&quot;_method&quot; value=&quot;put&quot;&gt;
&lt;textarea name=&quot;content&quot;&gt;&lt;%= @note.content %&gt;&lt;/textarea&gt;
&lt;input type=&quot;checkbox&quot; name=&quot;complete&quot; &lt;%= &quot;checked&quot; if @note.complete %&gt;&gt;
&lt;input type=&quot;submit&quot;&gt;
&lt;/form&gt;
&lt;p&gt;&lt;a href=&quot;/&lt;%= @note.id %&gt;/delete&quot;&gt;Delete&lt;/a&gt;&lt;/p&gt;
&lt;% else %&gt;
&lt;p&gt;Note not found.&lt;/p&gt;
&lt;% end %&gt;
[/code]
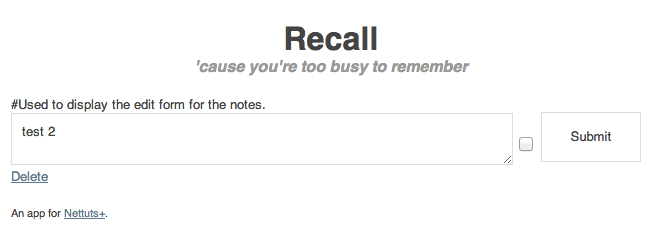
- You should refresh the browser to view the page. Note: If you do not notice any changes, then you may have missed something. Re-read, check your code and try again.
- If you click the “edit” button. You should see the an editable page containing your notes contents.
NOTE:RESTful Services defined: PUT – is generally used for updating existing information ,POST – is generally used for posting new information,GET – is generally used for displaying a page with information,DELETE – is used to removed information.
- Add the following code to recall.rb to handle the edit function.
[code lang=”css”]
put ‘/:id’ do
n = Note.get params[:id]
n.content = params[:content]
n.complete = params[:complete] ? 1 : 0
n.updated_at = Time.now
n.save
redirect ‘/’
end
[/code]
Note: Edit your notes to test. The edits should stick and you should be redirected following this edit.
- Create a file in the “views” folder and name it “delete.erb”. Place the following code inside of it:
[code lang=”css”]
&lt;% if @note %&gt;
&lt;p&gt;Are you sure you want to delete the following note: &lt;em&gt;&quot;&lt;%= @note.content %&gt;&quot;&lt;/em&gt;?&lt;/p&gt;
&lt;form action=&quot;/&lt;%= @note.id %&gt;&quot; method=&quot;post&quot;&gt;
&lt;input type=&quot;hidden&quot; name=&quot;_method&quot; value=&quot;delete&quot;&gt;
&lt;input type=&quot;submit&quot; value=&quot;Yes, Delete It!&quot;&gt;
&lt;a href=&quot;/&lt;%= @note.id %&gt;&quot;&gt;Cancel&lt;/a&gt;
&lt;/form&gt;
&lt;% else %&gt;
&lt;p&gt;Note not found.&lt;/p&gt;
&lt;% end %&gt;
[/code]
- Now we need to add the delete route inside of the recall.rb file with the following code:
[code lang=”css”]
delete ‘/:id’ do
n = Note.get params[:id]
n.destroy
redirect ‘/’
end
[/code]
Note: At this point you should be able to add, edit and delete a note without any errors. If you cannot you should review the steps and try again.
- Finally we will add the route for the completion link on the homepage by adding the following code to recall.rb
[code lang=”css”]
get ‘/:id/complete’ do
n = Note.get params[:id]
n.complete = n.complete ? 0 : 1 # flip it
n.updated_at = Time.now
n.save
redirect ‘/’
end
[/code]
- At this point you should have a fully functioning application with all click-cable links working. If you do not then you should review the steps and try again.
Security Notes: Prevent XSS (Cross-Site Scripting)using the feature. Using DataMapper prevents SQL Injection.
December 22, 2013
Time is running out for my learning Rails goal by the end of 2013 because I decided to learn Sinatra first but it has proven to be a valuable learning experience for working with Ruby. I still have 9 days and feel comfortable at this point that I can get through a rails application in that time.
Today I want to accomplish 4 (Bold Bullets) goals.
- Push the recall app into GIT
- Change directories to the directory THAT CONTAINS recall not the recall directory OR create a new directory to test the process.
Note: In this example we will stay with the recall app.
- Use the following code to initiate git
[code lang=”css”]
$ git init
# Sets up the necessary Git files
# Initialized empty Git repository in /Users/you/recall/.git/
[/code] - Use the following code to commit the entire directory to git (local)
[code lang=”css”]
git add recall
# Stages your README file, adding it to the list of files to be committedgit commit -m ‘first commit of recall’
# Commits your files, adding the message &quot;first commit&quot;
[/code]
Note: You have now committed your recall app to your local git.
Note: To view all of the local git repositories on your Mac use:
[code lang=”css”]
$ find /Users/username -name &quot;.git&quot; -print
[/code]
Note: #Shows all of the git repositories on your local machine. Source Stack
- Push a branch of the recall app into github
- Create a github account.
- Create a new git repository. See the steps here.
- Setup your Mac to connect to github. See steps here.
- Commit your recall directory to your github account.
[code lang=”css”]
#Continued from the steps in the first bullet above for local git commit.
git remote add origin https://github.com/username/recall.git
# Creates a remote named &quot;origin&quot; pointing at your GitHub repositorygit push origin master
# Sends your commits in the &quot;master&quot; branch to GitHub
[/code]
Note: You may see prompts for a user name and password. Your github username and passwords that you created in step 2 above.
December 26, 2013
My objective today is to complete these two objectives that I didn’t finish yesterday.
- Style the recall app with Bootstrap
- Initial research revealed some HAML tutorials and a few SINATRA/HAML/BOOTSTRAP github repositories. I am tempted to try HAML and at least one of the repositories but I am going to stay disciplined and avoid the distraction of trying these methods and stick to accomplishing my goal by hard coding bootstrap since I already know how that is done.
January 1, 2014
Happy New Year! Though I have not completed my objective of learning Rails prior to the end of 2013, I have learned quite a bit about the Sinatra Domain Specific Language, GIT and sqlite which are a powerful combination of tools for creating smaller web apps. Had it not been for the pursuit of Rails, I’d not have found these tools. Also, the year technically ends for me in February since that is when I actually began this challenge.
January 2, 2014
My objective today is to complete the following:
- Bootstrap integration with the recall app.
- Grab the Bootstrap source.
- Unzip and copy the css, js and img folders into your “public” folder of your “Recall” app directory
- Edit the layout.erb file to include the following
[code lang=”html”]
&lt;head&gt;
&lt;meta charset=&quot;utf8&quot;&gt;
&lt;title&gt;&lt;%= &quot;#{@title} | #{SITE_TITLE}&quot; %&gt;&lt;/title&gt;
&lt;!–Bootstrap kmb//–&gt;
&lt;link href=&quot;/css/boostrap.css&quot; rel=&quot;stylesheet&quot;&gt;
&lt;link href=&quot;/css/bootstrap-responsive.css&quot; rel=&quot;stylesheet&quot;&gt;
&lt;style&gt;
body {
padding-top: 60px; /*For use with the navbar-top-fixed*/
}
&lt;/style&gt;
&lt;!– Note below that I have commented out the previous recall app css references. You can omit the next 4 rows (including this one) if you like.//–&gt;
&lt;!–Default
&lt;link href=&quot;/reset.css&quot; rel=&quot;stylesheet&quot;&gt;
&lt;link href=&quot;/style.css&quot; rel=&quot;stylesheet&quot;&gt;//–&gt;
&lt;/head&gt;
&lt;body&gt;[/code]
- Refresh the page and all of your existing styling (from the previous examples of the recall app on this page) should be gone.
- Place the following code inside of your “layout.erb” file just above the body tag. This code calls the jQuery javascript hosted via Google and falls back to your locally hosted jQuery javascript if Google’s hosting is blocked. As in some countries, instances, etc.
Note: If you have followed the previous example of the “recall” app. I’ve moved the “footer” tags beneath the “body” tags for more logical syntax.
[code lang=”html”]
&lt;%= yield %&gt;
&lt;script src=&quot;//ajax.googleapis.com/ajax/libs/jquery/1.2.6/jquery.min.js&quot;&gt;&lt;/script&gt;
&lt;script&gt;
if (!window.jQuery) {
document.write(‘&lt;script src=&quot;/path/to/your/jquery&quot;&gt;&lt;\/script&gt;’);
}
&lt;/script&gt;
&lt;/div&gt;
&lt;script src=&quot;/js/bootstrap.min.js&quot;&gt;&lt;/script&gt;
&lt;/body&gt;
&lt;footer&gt;
[/code]
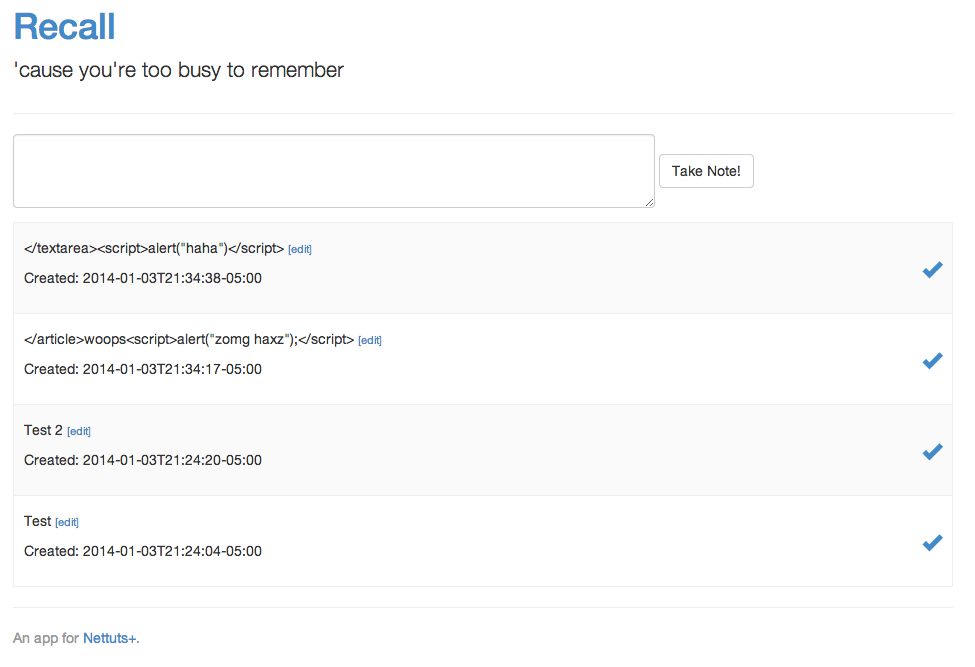
- At this point, the bootstrap version current should be integrated into your recall app. You can style it as you please. For the remainder of this tutorial, I will restyle the recall app (“Before” image) to make it look like the “After” image below.
Restyle the Recall app from Html5 Boilerplate to Bootstrap 3
- In layout.erb, place this just after the opening body tag
[code lang=”css”]&lt;div class=&quot;container&quot;&gt;[/code]
- In layout.erc, place this just above the closing body tag
[code lang=”css”]&lt;/div&gt;&lt;!– Close Container //–&gt;[/code]
- I, layout.erb, insert this just after the div / container tag
[code lang=”html”]
&lt;div class=&quot;page-header&quot;&gt;
&lt;h1&gt;&lt;%= SITE_TITLE %&gt;&lt;/h1&gt;
&lt;p class=&quot;lead&quot;&gt;&lt;%= SITE_DESCRIPTION %&gt;&lt;/p&gt;
&lt;/div&gt;
[/code]
Note: The tags starting <% are used to include the Site title and the Site description just as with the previous design.
- In layout.erb, remove the old html that was used to show the Site title and description
[code lang=”html”]
&lt;header&gt;
&lt;hgroup&gt;
&lt;h1&gt;&lt;a href=&quot;/&quot;&gt;&lt;%= SITE_TITLE %&gt;&lt;/a&gt;&lt;/h1&gt;
&lt;h2&gt;&lt;%= SITE_DESCRIPTION %&gt;&lt;/h2&gt;
&lt;/hgroup&gt;
&lt;/header&gt;
[/code]
- In layout.erb, update the flash alerts class to use the bootstraps alert and info features. The updated code should look like this:
[code lang=”html”]
&lt;% if flash[:notice] %&gt;
&lt;p class=&quot;alert alert-success&quot;&gt;&lt;%= flash[:notice] %&gt;&lt;/p&gt;
&lt;% end %&gt;
&lt;% if flash[:error] %&gt;
&lt;p class=&quot;alert alert-danger&quot;&gt;&lt;%= flash[:error] %&gt;&lt;/p&gt;
&lt;% end %&gt;
[/code]
- To style the form where the notes are entered, open the home.erb file and replace the “section” tags at the top with the following code:
[code lang=”html”]
&lt;section id=&quot;add&quot;&gt;
&lt;form class=&quot;form-inline&quot; role=&quot;form&quot; action=&quot;/&quot; method=&quot;post&quot;&gt;
&lt;div class=&quot;form-group&quot;&gt;
&lt;label class=&quot;sr-only&quot; for=&quot;exampleInputEmail2&quot;&gt;Email address&lt;/label&gt;
&lt;textarea name=&quot;content&quot; class=&quot;form-control&quot; rows=&quot;3&quot; cols=&quot;100&quot; cplaceholder=&quot;Your note&amp;hellip;&quot;&gt;&lt;/textarea&gt;
&lt;/div&gt;
&lt;button type=&quot;submit&quot; class=&quot;btn btn-default&quot;&gt;Take Note!&lt;/button&gt;
&lt;/form&gt;
&lt;div style=&quot;margin-bottom: 1em;&quot;&gt;&lt;/div&gt;&lt;!– Adds a bit of space beneath the textarea //–&gt;
&lt;/section&gt;
[/code]
- To style the zerba stripes and align the note itself, edit link and completion button. Edit layout.erb, copy and paste the “article” and “links” classes from the previously mentioned css (Step 20 above) in between the style tags as follows:
[code lang=”html”]
&lt;link href=&quot;/style.css&quot; rel=&quot;stylesheet&quot;&gt;//–&gt;
&lt;style&gt;
body {
padding-top: 60px; /*For use with the navbar-top-fixed*/
}
article {
border: 1px solid #eee;
border-top: none;
padding: 15px 10px;
}
article:first-of-type {
border: 1px solid #eee;
}
article:nth-child(even) {
background: #fafafa;
}
article.complete {
background: #fedae3;
}
article span {
font-size: 0.8em;
}
.links {
font-size: 1.8em;
line-height: 0.8em;
float: right;
margin: -10px 0 0;
}
.links a {
display: block;
text-decoration: none;
}
&lt;/style&gt;
&lt;/head&gt;
[/code]
- Next we will change the lighting bolt icon created with ↯ which appears to be an ascii code into a bootstrap Glyphicon icon of a checkmark. This is also done within the home.erb file
[code lang=”html”]
&lt;% @notes.each do |note| %&gt;
&lt;article &lt;%= ‘class=&quot;complete&quot;’ if note.complete %&gt;&gt;
&lt;p&gt;
&lt;%=h note.content %&gt;
&lt;span&gt;&lt;a href=&quot;/&lt;%= note.id %&gt;&quot;&gt;[edit]&lt;/a&gt;&lt;/span&gt;
&lt;/p&gt;
&lt;p class=&quot;links&quot;&gt;
&lt;a href=&quot;/&lt;%= note.id %&gt;/complete&quot;&gt;&lt;span class=&quot;glyphicon glyphicon-ok&quot;&gt;&lt;/span&gt;&lt;/a&gt;
&lt;/p&gt;
&lt;p class=&quot;meta&quot;&gt;Created: &lt;%= note.created_at %&gt;&lt;/p&gt;
&lt;/article&gt;
&lt;% end %&gt;
[/code]
- Last but not least, our footer is aligned to the left of the screen and we need to align it with the rest of the app. To do this, we move it inside of the container closing tag. The bottom of the layout.erb file should appear as follows:
[code lang=”html”]
&lt;script src=&quot;/js/bootstrap.min.js&quot;&gt;&lt;/script&gt;
&lt;/body&gt;
&lt;div id=&quot;footer&quot;&gt;
&lt;hr/&gt;
&lt;p class=&quot;text-muted&quot;&gt;An app for &lt;a href=&quot;http://net.tutsplus.com&quot;&gt;Nettuts+&lt;/a&gt;.&lt;/p&gt;
&lt;/div&gt;
&lt;/div&gt;&lt;!– close container //–&gt;
&lt;/html&gt;
[/code]
- Save all of the changes and hit the refresh button and you should see a completely redesign recall app. This task should now be complete. If not, you should review and repeat the steps carefully.
Push the recall app to Herouku
- Create a Heroku account by visiting https://id.heroku.com/signup
- At the terminal command line type
[code lang=”css”]
gem install heroku
heroku create kyles-recall –stack cedar //–stack cedar may or may not be required. I used it to avoid an error that I was receiving.
git push heroku master
[/code]
Note: There is also a Heroku executable available at https://toolbelt.heroku.com/. Based on the instructions there doesn’t appear to be much difference beyond the installation process.
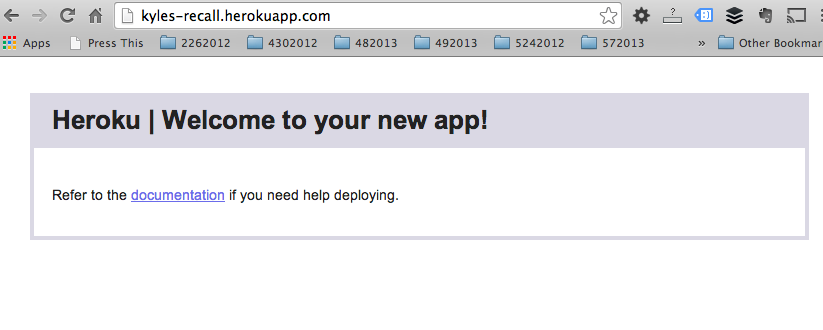
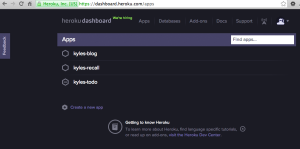
- We now have a directory setup on a sub-domain at kyles-recall.herokuapp.com
Note: Although the directory is setup we have not yet pushed that app as the image reflects.
- I attempted to use the following code to push the recall app to heroku:
Note: I originally got an error “Push rejected, no Cedar-supported app detected”. Research and testing lead to missing Gemfile and Gemlock files. These can be obtained from the original tutorial here. Included them in the recall directory and run the code below from the command line. Shout out to stack for this answer which helped.
[code lang=”css”]
$ cd &lt;path-to-recall&gt;
$ git init
$ git add .
$ git commit -m &quot;Heroku commit&quot;
$ git push heroku master
[/code]
Note:If you receive json errors afterwards, simple remove the json entries from the Gemfile.lock file. The source code is a bit old and json is already included.
- All errors were cleared and the app seemed to push to heroku successfully until I got the following error when visiting kyles-recall.herokuapp.com (this path is shown in the terminal after a successful push)
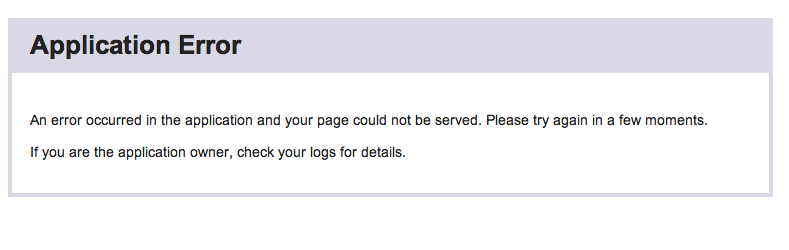
- I’m still running into issues getting this app which runs fine locally to deploy to heroku. It appears to be related to the fact that sqlite doesn’t run on heroku efficiently if at all. Instead, Postgresql is the production database of choice for heroku. I believe that once I can get past the database issue, I can complete the deployment to heroku.
Bailing
- At this point I am going to bail on the deployment to heroku task. Primarily because I don’t want to become distracted from my primary objective of learning rails and partially because the code is based on a two year old tutorial and there are likely minor outdated methods contributing to the issues that I am having. In the end, this exercise was never intended to include heroku and the time will be put to better use learning rails. My takeway for future development either way is to avoid sqlite and install Postresql locally or connect remotely.
January 11, 2014
Even though this exercise is about learning Rails I decided to complete the task and do a tutorial that will include Sinatra, PostgreSQL and Heroku to enforce what I have learned up to this point. In addition, I felt that since the database(postgreSQL) and hosting platform(heroku) are essential to an apps ability to be robust and seen by the world where as local development is limited to my eyes. Click here to see the tutorial.
January 13, 2014
Planning on getting back to Rails prior to this weeks end.
January 17, 2014
Resuming Rails as planned. I am reviewing some Rails tutorials and training today around the web and it appears that there are some things that I have already covered with Sinatra.
I decided to install the PGADMIN which provides a visual interface for managing postgreSQL databases. This is not a requirement to learning rails but based on past experience, I know that having such a tool is useful for managing database content.
January 18, 2014
 I’m skimmed through some Rails tutorials and will tie it all together here.
I decided to keep this tutorial to developing a Rails application step-by-step. In addition things such as setting up your development environment and GIT have been covered previously in the post. Please reference there when needed or submit a question in the comments section.
There will not be a lot of detail given as to the why’s. There is a wealth of why data available on the Internet.
NOTE: Periodically you will see the word REFRESH in this post. It is to let you know that you can refresh your browser at that point in the tutorial.
Prior to refreshing your browser the ruby server must be stopped (press CTRL+C at the terminal) and restarted ($ ruby myapp.rb). You can do it that way OR you can use shotgun instead.
Shotgun allows your to refresh your browser without stopping and starting the ruby server to see changes made to files. To use shotgun. Install and run that gem at the terminal using:
1 $ install shotgun
2 $ shotgun myapp.rb
After these commands are issued, you will not need to start and stop the ruby server after files are created, edited or deleted. You will need to use localhost:9393 instead of localhost:3000. To stop using shotgun get back to using the standard method, stop the server and start it with the traditional method ($ ruby myapp.rb).
Objective: Create a basic Rails app of a To Do list which is very common so I am going to add user authentication and I will use the twitter bootstrap for styling, rules to use a sqlite3 database locally on a MAC and a postgreSQL for production at heroku, then upload it to Heroku.
- Create a directory call “todo”. You can use the GUI or the command line.
Note: You could skip this step and start at step 3 if you do not want to create your app within a sub-directory. I did this way because it helps keep me organized.
- Launch the terminal and then change to that directory.
January 21, 2014
– Missed a day due to MLK holiday where I reflected on the accomplishments of MLK Jr and spent time with my son and wife.
- Type the following code into the terminal to install Rails:
[code lang=”html”]$ gem install rails –no-ri –no-rdoc[/code]
- Change directories to “todo” using code:
- Note: The “–no-ri –no-rdoc” portion of the command will install rails without the Rails documentation.
[code lang=”css”]$ cd todo[/code]
- Create the files required for the app by typing the following command into the terminal:
[code lang=”css”]$ rails new todo[/code]
- Start the Ruby server by typing the following command into the terminal:
[code lang=”css”]$ rails s[/code]
- Open your browser and visit the following url
- Note: Optionally you can use shotgun. See December 4 section above for more info on shotgun.
[code lang=”html”]http://localhost:3000[/code]
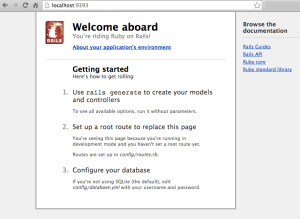
- Note: You should see a page similar to this image. Url is localhost:9393 is you are using shotgun.
January 24, 2014
- Look in your apps root directory (e.g. todo/gemfile) and open the “gemfile” in your text editor of choice and add the following code:
[code lang=”html”]
gem ‘devise’
[/code]
January 31, 2014
- Open the terminal and add the following code:
Note: The code will install the devise gem.
[code lang=”html”]
gem install devise
[/code]
Note: You may receive a message about recommended configuration. Proceed to the next step.
- Add and execute the following code in the terminal:
Note: The code will setup all of the models required for devise to work properly.
[code lang=”html”]
rails g devise:install
[/code]
- Add and execute the following code in the terminal:
Note: The code will setup a model named “user” to store data in the database.
[code lang=”html”]
rails g devise user
[/code]
- Add and execute the following code in the terminal:
Note: The code will send the model information to the database.
[code lang=”html”]
rails g devise user
[/code]
That quickly we have included all of the elements required to handle basics user authentication. (e.g. register,login, logout)
Note: I am going to run “$ bundle install” at the terminal because I think it is a requirement to get devise completely working without error.
February 2, 2014
SUPERBOWL – I may get some of this done today and I may not. Also today officially puts me over the 12 month goal. I missed my deadline of 212014 but am more than pleased with my progress.
- Add and execute the following code in the terminal:
Note: The code will set up an index page for the app. This will create a series of files and a directory named “home” inside of the “views” directory. (E.g. views/home and a home_controller.rb file inside of the controller directory just to name a couple that you can look at.)
[code lang=”html”]
rails g controller home
[/code]
- Add the following code to the “config/routes.rb” file:
Note: This will set up a default index page for the app.
[code lang=”html”]
root to:index =&gt; &quot;home#index&quot;
[/code]
REFRESH
Note: You may get the following page and error. If you do you need to create a file named “index.html.erb” and save it inside of the “views/home” directory. Place any basic html inside of the file. I used the following:
[code lang=”html”]
&lt;h1&gt;Welcome to todo&lt;/h1&gt;
&lt;p&gt;home#index&lt;/p&gt;
&lt;p&gt;Find me in app/views/home/index.html.erb&lt;/p&gt;
[/code]
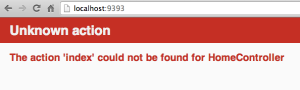
Refresh and your app should look like the image below:

Next we will add a command to the terminal for the logged in view as follows:
Note: The code will set up another page for the app. NOTICE THE EXTRA O IN “TODOO” (This is to prevent duplicate errors since we have named other files and directories “todo”). This will create a series of files and a directory named “todoo” inside of the “views” directory. (E.g. views/todoo and a todoo_controller.rb file inside of the controller directory just to name a couple that you can look at.)
[code lang=”html”]
rails g controller todoo
[/code]
- Add the following code on line 7 to the “config/routes.rb” file:
[code lang=”html”]
#The first 8 lines of your routes.rb file should look like this
Todo::Application.routes.draw do
devise_for :users
root :to =&gt; &quot;home#index&quot;
resources :todoo
# The priority is based upon order of creation: first created -&gt; highest priority.
# See how all your routes lay out with &quot;rake routes&quot;.
[/code]
February 3, 2014
- Add and execute the following code in the terminal:
Note: The code will set up a model for todoo. This will create a series of files.
[code lang=”html”]
rails g model todoo name:string done:boolean
[/code]
Your results should look like these:
[code lang=”html”]
kmbs-MacBook-Air:todo kmb$ rails g model todoo name:string done:boolean
invoke active_record
create db/migrate/20140203190657_create_todoos.rb
create app/models/todoo.rb
invoke test_unit
create test/models/todoo_test.rb
create test/fixtures/todoos.yml
[/code]
REFRESH – Following a refresh I received an error. The error had built in instructions from rails as follows:
I executed the suggested command and refreshed. The issue was resolved.
- Add the code on line 4-7 to the home_controller.rb file inside of “apps/controllers/”:
Note: The home_controller.rb file should like like this:
[code lang=”html”]
class HomeController &lt; ApplicationController
def index
if user_signed_in? #Checks to see if the user is signed in.
redirect_to :controller =&gt; ‘todoo’, :action =&gt; ‘index’
end
end
end
[/code]
- Add the code on line 3-5 to the todoo_controller.rb file inside of “apps/controllers/”:
Note: The todoo_controller.rb file should like like this:
[code lang=”html”]
class TodooController &lt; ApplicationController
def index
@todos = Todoo.where(done: false) # If todos are false, add to the todos array
@todone = Todoo.where(done: true) # If todos are true, add to the todone array
end
end
[/code]
- Add this code to the index.html.erb file inside of “views/todoo/”:
Note: If the index.html.erb file does not exist, create it and add the following code:
[code lang=”html”]
&lt;h1&gt;To Do Items&lt;/h1&gt;
&lt;h2&gt;ToDo:&lt;/h2&gt;
&lt;% @todos.each do |t| %&gt;
&lt;p&gt;
&lt;strong&gt;&lt;%= t.name %&gt;&lt;/strong&gt;
&lt;small&gt;&lt;%= link_to &quot;Mark as done&quot;, todoo_path(t), :method =&gt; :put %&gt;&lt;/small&gt;
&lt;/p&gt;
&lt;% end %&gt;
&lt;h2&gt;ToDone:&lt;/h2&gt;
&lt;% @todone.each do |t| %&gt;
&lt;p&gt;
&lt;strong&gt;&lt;%= t.name %&gt;&lt;/strong&gt;
&lt;small&gt;&lt;%= link_to &quot;Remove&quot;, todoo_path(t), :confirm =&gt; &quot;Is it ok to remove this?&quot;, :method =&gt; :delete %&gt;&lt;/small&gt;
&lt;/p&gt;
&lt;% end %&gt;
&lt;p&gt;&lt;% link_to(&quot;Add an item to the list&quot;, new_todo_path) %&gt;&lt;/p&gt;
[/code]
- You will need to create a file to handle new items for the todo list.
- Add the code on line 8-10 to the todoo_controller.rb file inside of “apps/controllers/”:
Note: The todoo_controller.rb file should like like this:
[code lang=”html”]
class TodooController &lt; ApplicationController
def index
@todos = Todoo.where(done: false)
@todone = Todoo.where(done: true)
end
#Start of code that handles the creation of new todo items
def new
@todo = Todoo.new
end
def todo_params
params.require(:todoo).permit(:name, :done)
end
def create
@todo = Todoo.new(todoo_params)
if @todo.save
redirect_to todoo_index_path, :notice =&gt; &quot;Your todo item was created!&quot;
else
render &quot;New&quot;
end
end
#End of code that handles the creation of new todo items
end
[/code]
- Create a filed named “new.html.erb” file inside of “views/todoo/” and add the following code:
[code lang=”html”]
&lt;h1&gt;Add new items to your todo list&lt;/h1&gt;
&lt;%= form_for @todo, :url =&gt; todoo_index_path(@todo) do |f| %&gt;
&lt;%= f.label :name %&gt;&lt;%= f.text_field :name %&gt;
&lt;%= f.hidden_field :done, :value =&gt; false %&gt;
&lt;%= f.submit &quot;Add to todo list&quot; %&gt;
&lt;% end %&gt;
[/code]
- Update the file named “application.html.erb” file inside of “views/layouts/”. This file should look like the following:
[code lang=”html”]
&lt;!DOCTYPE html&gt;
&lt;html&gt;
&lt;head&gt;
&lt;title&gt;Todo&lt;/title&gt;
&lt;%= stylesheet_link_tag &quot;application&quot;, media: &quot;all&quot;, &quot;data-turbolinks-track&quot; =&gt; true %&gt;
&lt;%= javascript_include_tag &quot;application&quot;, &quot;data-turbolinks-track&quot; =&gt; true %&gt;
&lt;%= csrf_meta_tags %&gt;
&lt;/head&gt;
&lt;body&gt;
&lt;% if user_signed_in? %&gt;
You are currently signed in as &lt;%= current_user.email %&gt;, not you?
&lt;%= link_to &quot;Sign out?&quot;, destroy_user_session_path, :method =&gt; :delete %&gt;
&lt;% else %&gt;
&lt;%= link_to &quot;Sign up!&quot;, new_user_registration_path %&gt; or &lt;%= link_to &quot;Sign in&quot;, new_user_session_path %&gt;
&lt;% end %&gt;
&lt;% flash.each do |name,message| %&gt;
&lt;% content_tag :div, :message, :id =&gt; &quot;flash_#{name}&quot; %&gt;
&lt;% end %&gt;
&lt;%= yield %&gt;
&lt;/body&gt;
&lt;/html&gt;
[/code]
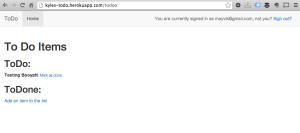
REFRESH – At this point you should have a fully functional Rails app that displays items on your todo list, allows you to mark those items as done, allows you to delete those items and should look like this:
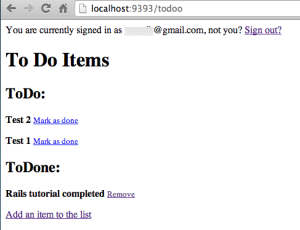
Note: There are two todo items and one completed todo that I added for testing. You should test yours as well.
- At this point I will save and commit these changes to GIT using the following code at the terminal:
Note: Normally I would recommend committing changes with every change.
[code lang=”html”]
$ git init
$ git add .
$ git commit -am &quot;initial commit&quot;
[/code]
February 4, 2014
Styling with the Twitter Bootstrap
– My objective in this section is to style the existing app using the Twitter Bootstrap framework.
Note: I wrote an earlier post about styling Sinatra using Twitter Bootstrap and will refer to it to reduce repetitive actions and save time.
- Open the “application.html.erb” file and update the existing code. You code should look like the following code:
[code lang=”html”]
&lt;!DOCTYPE html&gt;
&lt;html lang=&quot;en&quot;&gt;
&lt;head&gt;
&lt;%= stylesheet_link_tag &quot;application&quot;, media: &quot;all&quot;, &quot;data-turbolinks-track&quot; =&gt; true %&gt;
&lt;%= javascript_include_tag &quot;application&quot;, &quot;data-turbolinks-track&quot; =&gt; true %&gt;
&lt;%= csrf_meta_tags %&gt;
&lt;meta charset=&quot;utf-8&quot;&gt;
&lt;meta name=&quot;viewport&quot; content=&quot;width=device-width, initial-scale=1.0&quot;&gt;
&lt;meta name=&quot;description&quot; content=&quot;&quot;&gt;
&lt;meta name=&quot;author&quot; content=&quot;&quot;&gt;
&lt;title&gt;ToDo&lt;/title&gt;
&lt;link href=&quot;http://netdna.bootstrapcdn.com/bootstrap/3.0.0/css/bootstrap.min.css&quot; rel=&quot;stylesheet&quot;&gt;
&lt;style&gt;
body {
padding-top: 75px;
}
.starter-template {
padding: 40px 15px;
text-align: center;
}
.container {
max-width:1000px;
}
&lt;/style&gt;
&lt;/head&gt;
&lt;body&gt;
&lt;div class=&quot;navbar navbar-default navbar-fixed-top&quot;&gt;
&lt;div class=&quot;container&quot;&gt;
&lt;div class=&quot;navbar-header&quot;&gt;
&lt;button type=&quot;button&quot; class=&quot;navbar-toggle&quot; data-toggle=&quot;collapse&quot; data-target=&quot;.navbar-collapse&quot;&gt;
&lt;span class=&quot;icon-bar&quot;&gt;&lt;/span&gt;
&lt;span class=&quot;icon-bar&quot;&gt;&lt;/span&gt;
&lt;span class=&quot;icon-bar&quot;&gt;&lt;/span&gt;
&lt;/button&gt;
&lt;a class=&quot;navbar-brand&quot; href=&quot;/&quot;&gt;ToDo&lt;/a&gt;
&lt;/div&gt;
&lt;div class=&quot;collapse navbar-collapse&quot;&gt;
&lt;ul class=&quot;nav navbar-nav&quot;&gt;
&lt;li class=&quot;active&quot;&gt;&lt;a href=&quot;/&quot;&gt;Home&lt;/a&gt;&lt;/li&gt;
&lt;/ul&gt;
&lt;p class=&quot;navbar-text navbar-right&quot;&gt;
&lt;% if user_signed_in? %&gt;
You are currently signed in as &lt;%= current_user.email %&gt;, not you?
&lt;%= link_to &quot;Sign out?&quot;, destroy_user_session_path, :method =&gt; :delete %&gt;
&lt;% else %&gt;
&lt;%= link_to &quot;Sign up!&quot;, new_user_registration_path %&gt; or &lt;%= link_to &quot;Sign in&quot;, new_user_session_path %&gt;
&lt;% end %&gt;&lt;/p&gt;
&lt;/div&gt;&lt;!–/.nav-collapse –&gt;
&lt;/div&gt;
&lt;/div&gt;
&lt;div class=&quot;container&quot;&gt;
&lt;% if flash[:notice] %&gt;
&lt;p class=&quot;alert alert-success&quot;&gt;&lt;%= flash[:notice] %&gt;
&lt;% end %&gt;
&lt;% if flash[:error] %&gt;
&lt;p class=&quot;alert alert-warning&quot;&gt;&lt;%= flash[:error] %&gt;
&lt;% end %&gt;
&lt;!– Start – This is no longer needed to handle error messages and can be removed //–&gt;
&lt;% flash.each do |name,message| %&gt;
&lt;% content_tag :div, :message, :id =&gt; &quot;flash_#{name}&quot; %&gt;
&lt;% end %&gt;
&lt;!– End – This is no longer needed to handle error messages and can be removed //–&gt;
&lt;%= yield %&gt;
&lt;/div&gt;&lt;!– /.container –&gt;
&lt;!– Bootstrap core JavaScript
================================================== –&gt;
&lt;!– Placed at the end of the document so the pages load faster –&gt;
&lt;script src=&quot;http://code.jquery.com/jquery-1.10.2.min.js&quot;&gt;&lt;/script&gt;
&lt;script src=&quot;http://getbootstrap.com/dist/js/bootstrap.min.js&quot;&gt;&lt;/script&gt;
&lt;script&gt;
//** removes alerts after 4 seconds */
window.setTimeout(function() {
$(&quot;.alert&quot;).fadeTo(4500, 0).slideUp(500, function(){
$(this).remove();
});
}, 4000);
&lt;/script&gt;
&lt;/body&gt;
&lt;/html&gt;
[/code]
- That’s it. Crazy simple and easy right.
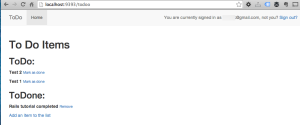
Note: The pages that are controlled by the “Devise” Gem (Controls user registration, forgot password, etc) will not receive all of the styling because the pages are hidden by Rails. Optionally you could edit the “Devise” Gem pages by executing the following code at the terminal to extract the files to your “app/views/devise” directory for editing.
[code lang=”html”]
$ rails generate devise:views
[/code]
Example – Lets say that you wanted to update the new user sign-up page seen below:
- You would open the “app/views/devise/registrations/new.html.erb” file in a text editor. It should look like this inside:
[code lang=”html”]
&lt;h2&gt;Sign up&lt;/h2&gt;
&lt;%= form_for(resource, :as =&gt; resource_name, :url =&gt; registration_path(resource_name)) do |f| %&gt;
&lt;%= devise_error_messages! %&gt;
&lt;div&gt;&lt;%= f.label :email %&gt;&lt;br /&gt;
&lt;%= f.email_field :email, :autofocus =&gt; true %&gt;&lt;/div&gt;
&lt;div&gt;&lt;%= f.label :password %&gt;&lt;br /&gt;
&lt;%= f.password_field :password %&gt;&lt;/div&gt;
&lt;div&gt;&lt;%= f.label :password_confirmation %&gt;&lt;br /&gt;
&lt;%= f.password_field :password_confirmation %&gt;&lt;/div&gt;
&lt;div&gt;&lt;%= f.submit &quot;Sign up&quot; %&gt;&lt;/div&gt;
&lt;% end %&gt;
&lt;%= render &quot;devise/shared/links&quot; %&gt;
[/code]
- Update the existing file with the following code:
Note: Twitter Bootstrap code is available here. What I did to save time was follow the steps here at octolab and customize the elements:
[code lang=”html”]
&lt;div class=&quot;border-form-div&quot;&gt;
&lt;h2&gt;Sign up&lt;/h2&gt;
&lt;%= form_for(resource, :as =&gt; resource_name, :url =&gt; registration_path(resource_name)) do |f| %&gt;
&lt;%= devise_error_messages! %&gt;
&lt;%= f.email_field :email, :autofocus =&gt; true, :placeholder =&gt; ‘Email address’ %&gt;
&lt;%= f.password_field :password, :placeholder =&gt; ‘Password’ %&gt;
&lt;%= f.password_field :password_confirmation, :placeholder =&gt; ‘Password confirmation’ %&gt;
&lt;%= f.submit &quot;Sign up&quot;,:class=&gt;’btn btn-primary’ %&gt;
&lt;% end %&gt;
&lt;/div&gt;
[/code]
Note: I removed “<%= render “devise/shared/links” %>” because I already have a “sign-up” link in the navbar.
- You would then open the “app/views/devise/sessions/new.html.erb” file in a text editor. It should look like this inside:
[code lang=”html”]
&lt;h2&gt;Sign in&lt;/h2&gt;
&lt;%= form_for(resource, :as =&gt; resource_name, :url =&gt; session_path(resource_name)) do |f| %&gt;
&lt;div&gt;&lt;%= f.label :email %&gt;&lt;br /&gt;
&lt;%= f.email_field :email, :autofocus =&gt; true %&gt;&lt;/div&gt;
&lt;div&gt;&lt;%= f.label :password %&gt;&lt;br /&gt;
&lt;%= f.password_field :password %&gt;&lt;/div&gt;
&lt;% if devise_mapping.rememberable? -%&gt;
&lt;div&gt;&lt;%= f.check_box :remember_me %&gt; &lt;%= f.label :remember_me %&gt;&lt;/div&gt;
&lt;% end -%&gt;
&lt;div&gt;&lt;%= f.submit &quot;Sign in&quot; %&gt;&lt;/div&gt;
&lt;% end %&gt;
&lt;%= render &quot;devise/shared/links&quot; %&gt;
[/code]
- Update the existing file with the following code:
Note: Twitter Bootstrap code is available here. What I did to save time was follow the steps here at octolab and customize the elements:
[code lang=”html”]
&lt;div class=&quot;border-form-div&quot;&gt;
&lt;h2&gt;Sign in&lt;/h2&gt;
&lt;%= form_for(resource, :as =&gt; resource_name, :url =&gt; session_path(resource_name)) do |f| %&gt;
&lt;%= f.email_field :email, :autofocus =&gt; true %&gt;
&lt;%= f.password_field :password %&gt;
&lt;% if devise_mapping.rememberable? -%&gt;
&lt;label class=&quot;checkbox&quot;&gt; &lt;%= f.label :remember_me %&gt; Rembmer me &lt;/label&gt;
&lt;% end -%&gt;
&lt;%= f.submit &quot;Sign in&quot; %&gt;
&lt;% end %&gt;
&lt;%= render &quot;devise/shared/links&quot; %&gt;
&lt;/div&gt;
[/code]
Note: I removed “<%= render “devise/shared/links” %>” because I already have a “sign-up” link in the navbar.
- Finally, you want to add some css to the style tag at the top of the “app/views/layouts/application.html.erb” file as follows:
[code lang=”html”]
/* User sign in and sign forms. */
.border-form-div {
max-width: 300px;
padding: 19px 29px 29px;
margin: 0 auto 20px;
background-color: #fff;
border: 1px solid #e5e5e5;
-webkit-border-radius: 5px;
-moz-border-radius: 5px;
border-radius: 5px;
-webkit-box-shadow: 0 1px 2px rgba(0,0,0,.05);
-moz-box-shadow: 0 1px 2px rgba(0,0,0,.05);
box-shadow: 0 1px 2px rgba(0,0,0,.05);
}
.border-form-div .form-signin-heading,
.border-form-div .checkbox {
margin-bottom: 10px;
}
.border-form-div input[type=&quot;text&quot;],
.border-form-div input[type=&quot;email&quot;],
.border-form-div input[type=&quot;password&quot;] {
font-size: 16px;
height: auto;
margin-bottom: 15px;
padding: 7px 9px;
}
[/code]
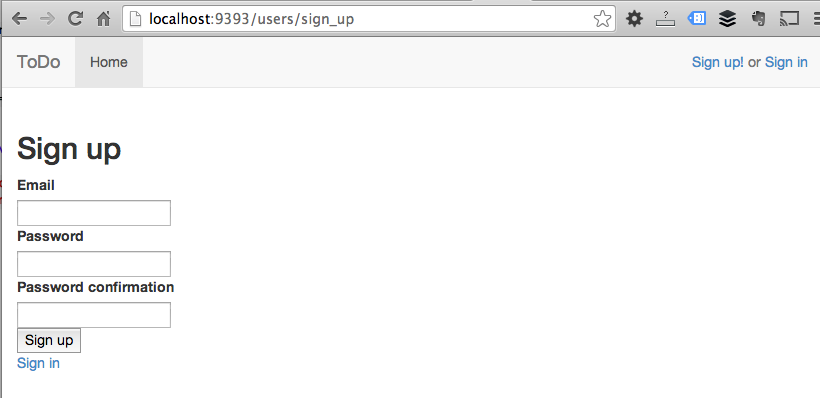
REFRESH – You should have a freshly style sign in page that looks like this:
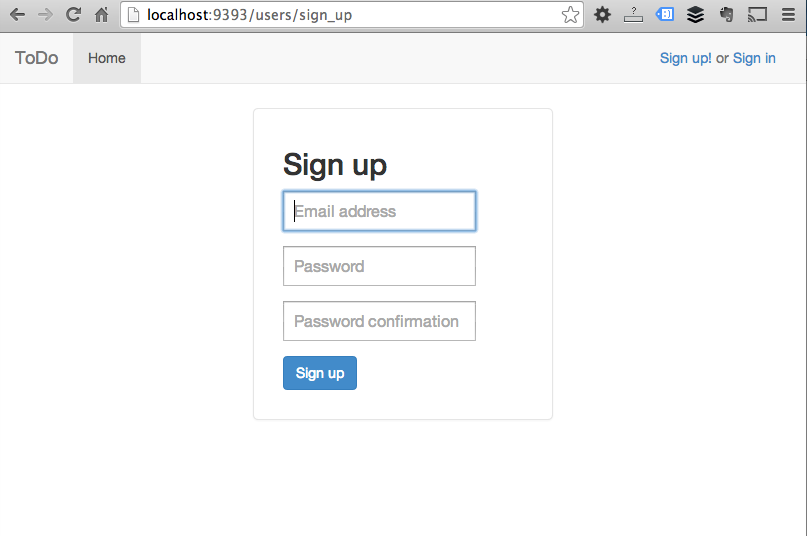
- Our app is now styled! Well as styled as it will be for now. You can Google styling devise with bootstrap if you want to more of the pages.
- The next thing I am going to test the app then commit it to git.
[code lang=”html”]
$ git init
$ git add .
$ git commit -am &quot;second commit with bootstrap&quot;
[/code]
February 5, 2014
HEROKU Push
- The next thing I want to do is to push this to heroku.
[code lang=”html”]
$ heroku create kyles-todo
$ git push heroku master
[/code]
IMPORTANT ISSUES FOR PUSHING FROM LOCAL MAC ENVIRONMENT USING SQLITE TO HEROKU WHICH USES POSTGRESQL
Error Message: I ran into an error message ‘Permission denied (publickey). fatal: Could not read from remote repository.’ even after though I have pushed apps to heroku previously.
Solution: I basically had to generate a new key and upload it to heroku. I used these two resources, stack and heroku support.
Error Message: I then ran into an issue where I could not deploy my app to heroku. I pulled the following message “Detected sqlite3 gem which is not supported on Heroku. https://devcenter.heroku.com/articles/sqlite3” from a large amount of text response in the terminal.
Solution: The issue at it’s core was basically that new rails apps by default are setup to use sqlite as the database. Heroku does not use sqlite, it uses postgreSQL as reference in the “Lessons learned” section below.
To resolve the issue I had to do two things:
- One I had edit some files so the the app would use postgresql for heroku. I personally also wanted to continue to use sqlite3 for local development so these instructions allowed me to do that. You need to comment out or remove the sqlite3 gem and add syntax for development use sqlite3 and for production use pg (postgresql). Edit the “Gemfile” file in the root of your apps directory as follows:
[code lang=”html”]
# Use sqlite3 as the database for Active Record
#gem ‘sqlite3’
group :development do
# Use sqlite3 as the database for Active Record
gem ‘sqlite3’
end
group :production do
gem ‘pg’
end
[/code]
- Then run “$ bundle install” at the terminal.
- Two I had to update the “config/database.yml” files so the the app would use postgresql for heroku. Though I have learned that this step may not be required, it is what I did to get things working. Edit the “production” section as follows:
[code lang=”html”]
production:
adapter: postgresql
database: my_production_database
pool: 5
timeout: 5000
[/code]
- Then commit to git and attempt to push to heroku using the same commands as mentioned earlier.
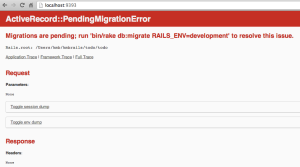
- At this point I was able to successfully deploy the app on to heroku at http://kyles-todo.herokuapp.com/. However, testing the app by clicking links failed and gave an error message “An error occurred in the application and your page could not be served. Please try again in a few moments.”. Running “rake db:create” and “rake db:migrate” failed to resolve the issue. I also notice the heroku website database page showed zero tables in my database so I knew the database was incomplete.I found some help at stack which led me to issue the command “$ heroku run rake db:migrate” which resulted in tables being created in the database at heroku and all links appearing to work.
Resources that helped where at heroku’s dev center and stack. I found many references to a popular railscast at http://railscasts.com/episodes/342-migrating-to-postgresql but it proved to be too broad, a bit old and touched on several topics such as installation of postgresql and other things that didn’t specifically address porting an existing rails application using sqlite to heroku.
MISSION ACCOMPLISHED
The app is now available on heroku at http://kyles-todo.herokuapp.com/
Note: There were some minor bugs that I need to fix but the app is deployed and live.
Bugs resolved app fully functional
The bug was that once logged in, you could not log out without receiving file not found error messages. What I did was to check the heroku logs locally at the terminal on my Mac using
[code lang=”html”]$ heroku logs[/code]
. The results showed in the terminal as a long list of text with timestamps. I skimmed this text and look for errors. What I found was that the javascript required to log out successfully via the Devise gem was not found at heroku. This apparently is a common problem where during deployment heroku attempts to use it’s own resources instead of uploading yours. So I had to do the following:
1. Precompile the assets locally.
1b. IMPORTANT – Do this step if 1-3 do not work. I am adding this step here because precompiling still would not work until I updated a boolean item from “false” to “true” inside of “config/environments/production.rb” file. The item is “config.assets.compile = true” on or about line 30.
2. Commit the new files to GIT.
3. Upload them to heroku with another push.
Voila – Issue resolved. The primary source that lead to the resolution at stack is here.
Another Resource – A good video for troubleshooting Rails errors while uploading to heroku.
Optionally you can push the code to github to house your code in the cloud for sharing.
Note: In this example I already have a github account (Learn how to create one). I have already created a repository at github for kyles-todo(Learn how to create one) and my Mac is already setup (Learn how here) to work with github. You must have these things completed before using the following code:
[code lang=”html”]
git remote add origin https://github.com/kmb40/todo.git
git push -u origin master
[/code]
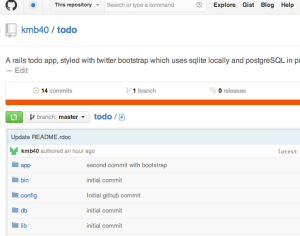
Get the code @ : https://github.com/kmb40/todo
Errors – I ran into two issues while uploading to github.
1. After executing the first command I received an error message stating “fatal: remote origin already exists.”. To resolve this I used the “$ git remote set-url origin https://github.com/kmb40/todo.git” command at the terminal.
2. After executing the second command I receive an error message stating “! [rejected] master -> master (fetch first)”. To resolve this I used the “$ git push –force https://github.com/kmb40/todo.git” command at the terminal. Before you use this command you should be 100% sure that your local code is newer than your github code. All I had at github was a readme file.
Let’s recap. We accomplished the following task:
- Created a todo list app locally on a Mac in rails with a sqlite database.
- Styled the app using the Twitter BootStrap framework.
- Deployed the final app to heroku for the public to see.
- Tested and debugged the production app.
- Pushed the files to github for the public to use.
I hope that this is as useful to you as it was to me.
Please forward any comments or questions.
*Other tutorials that I created along side this one out of curiosity may be useful.
Lessons learned
I found this experience was very rewarding. I learned the Ruby programming language, the Rails framework, the GIT version control system, GITHUB (a cloud version of GIT), Sinatra (A domain specific language | framework) and heroku in 12 months and a few days. If I had attempted to do this non stop, I could have done it in about 6 months. What I feel are major keys to success as with any technology, are staying current with software versions, correcting errors, and know where to go to get best practices and answers. By far the content at Stackoverflow proved to be extermly valuable in completing this project.
Heroku | postgreSQL – Consider using a postgreSQL database locally for development to speed the deployment process to a production server like heroku which will likely use postgreSQL and not sqlite. Reference heroku dev center for more detail. Instead of starting a new rails app using the standard command:
[code lang=”html”]
$ rails new
[/code]
Use this command instead to setup the app (locally) to use a postgresql database. You should have postgreSQL installed if you are running a MAC with 10.8 or later. Even then, you should update to the latest version of postgreSQL.
[code lang=”html”]
$ rails new -d postgresql
[/code]
Thanks for the rails tutorial. It was very thorough and I learned a lot! Keep up the excellent work, Kyle!
Glad you found it useful. Send me a link to your first app.
Kyle